


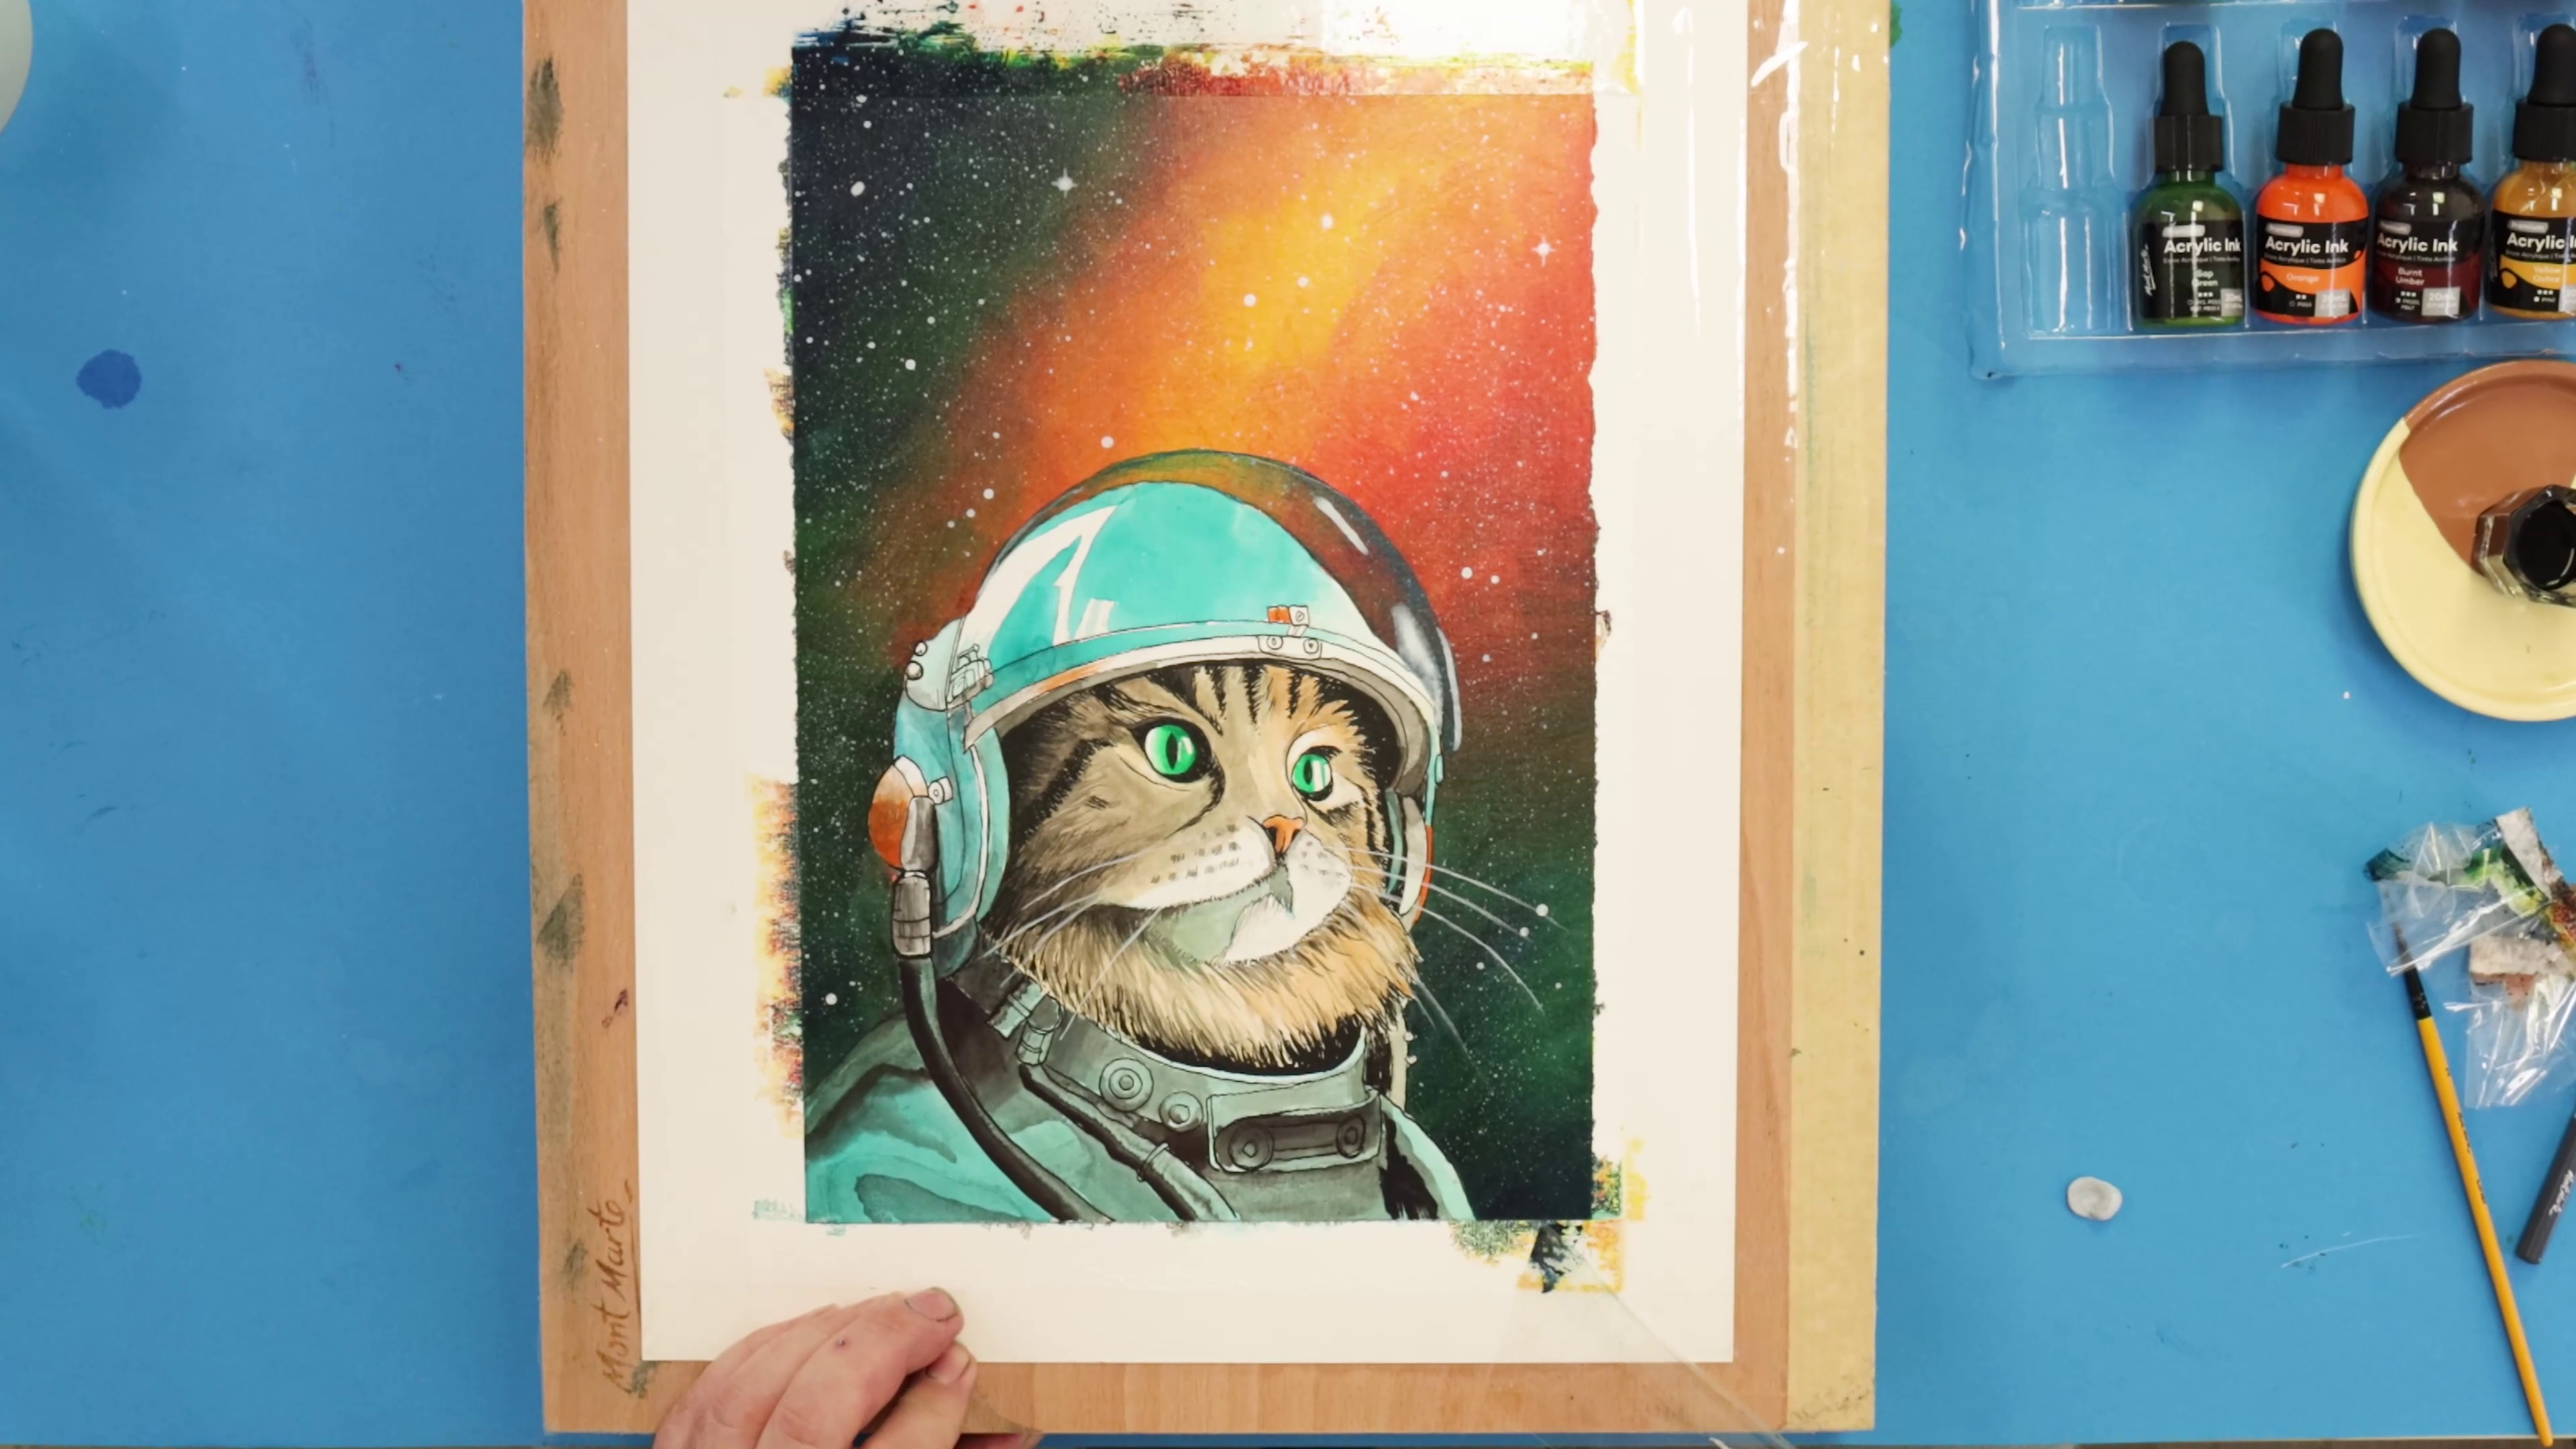
Cat in space art using acrylic inks
Step 1: Drawing reference
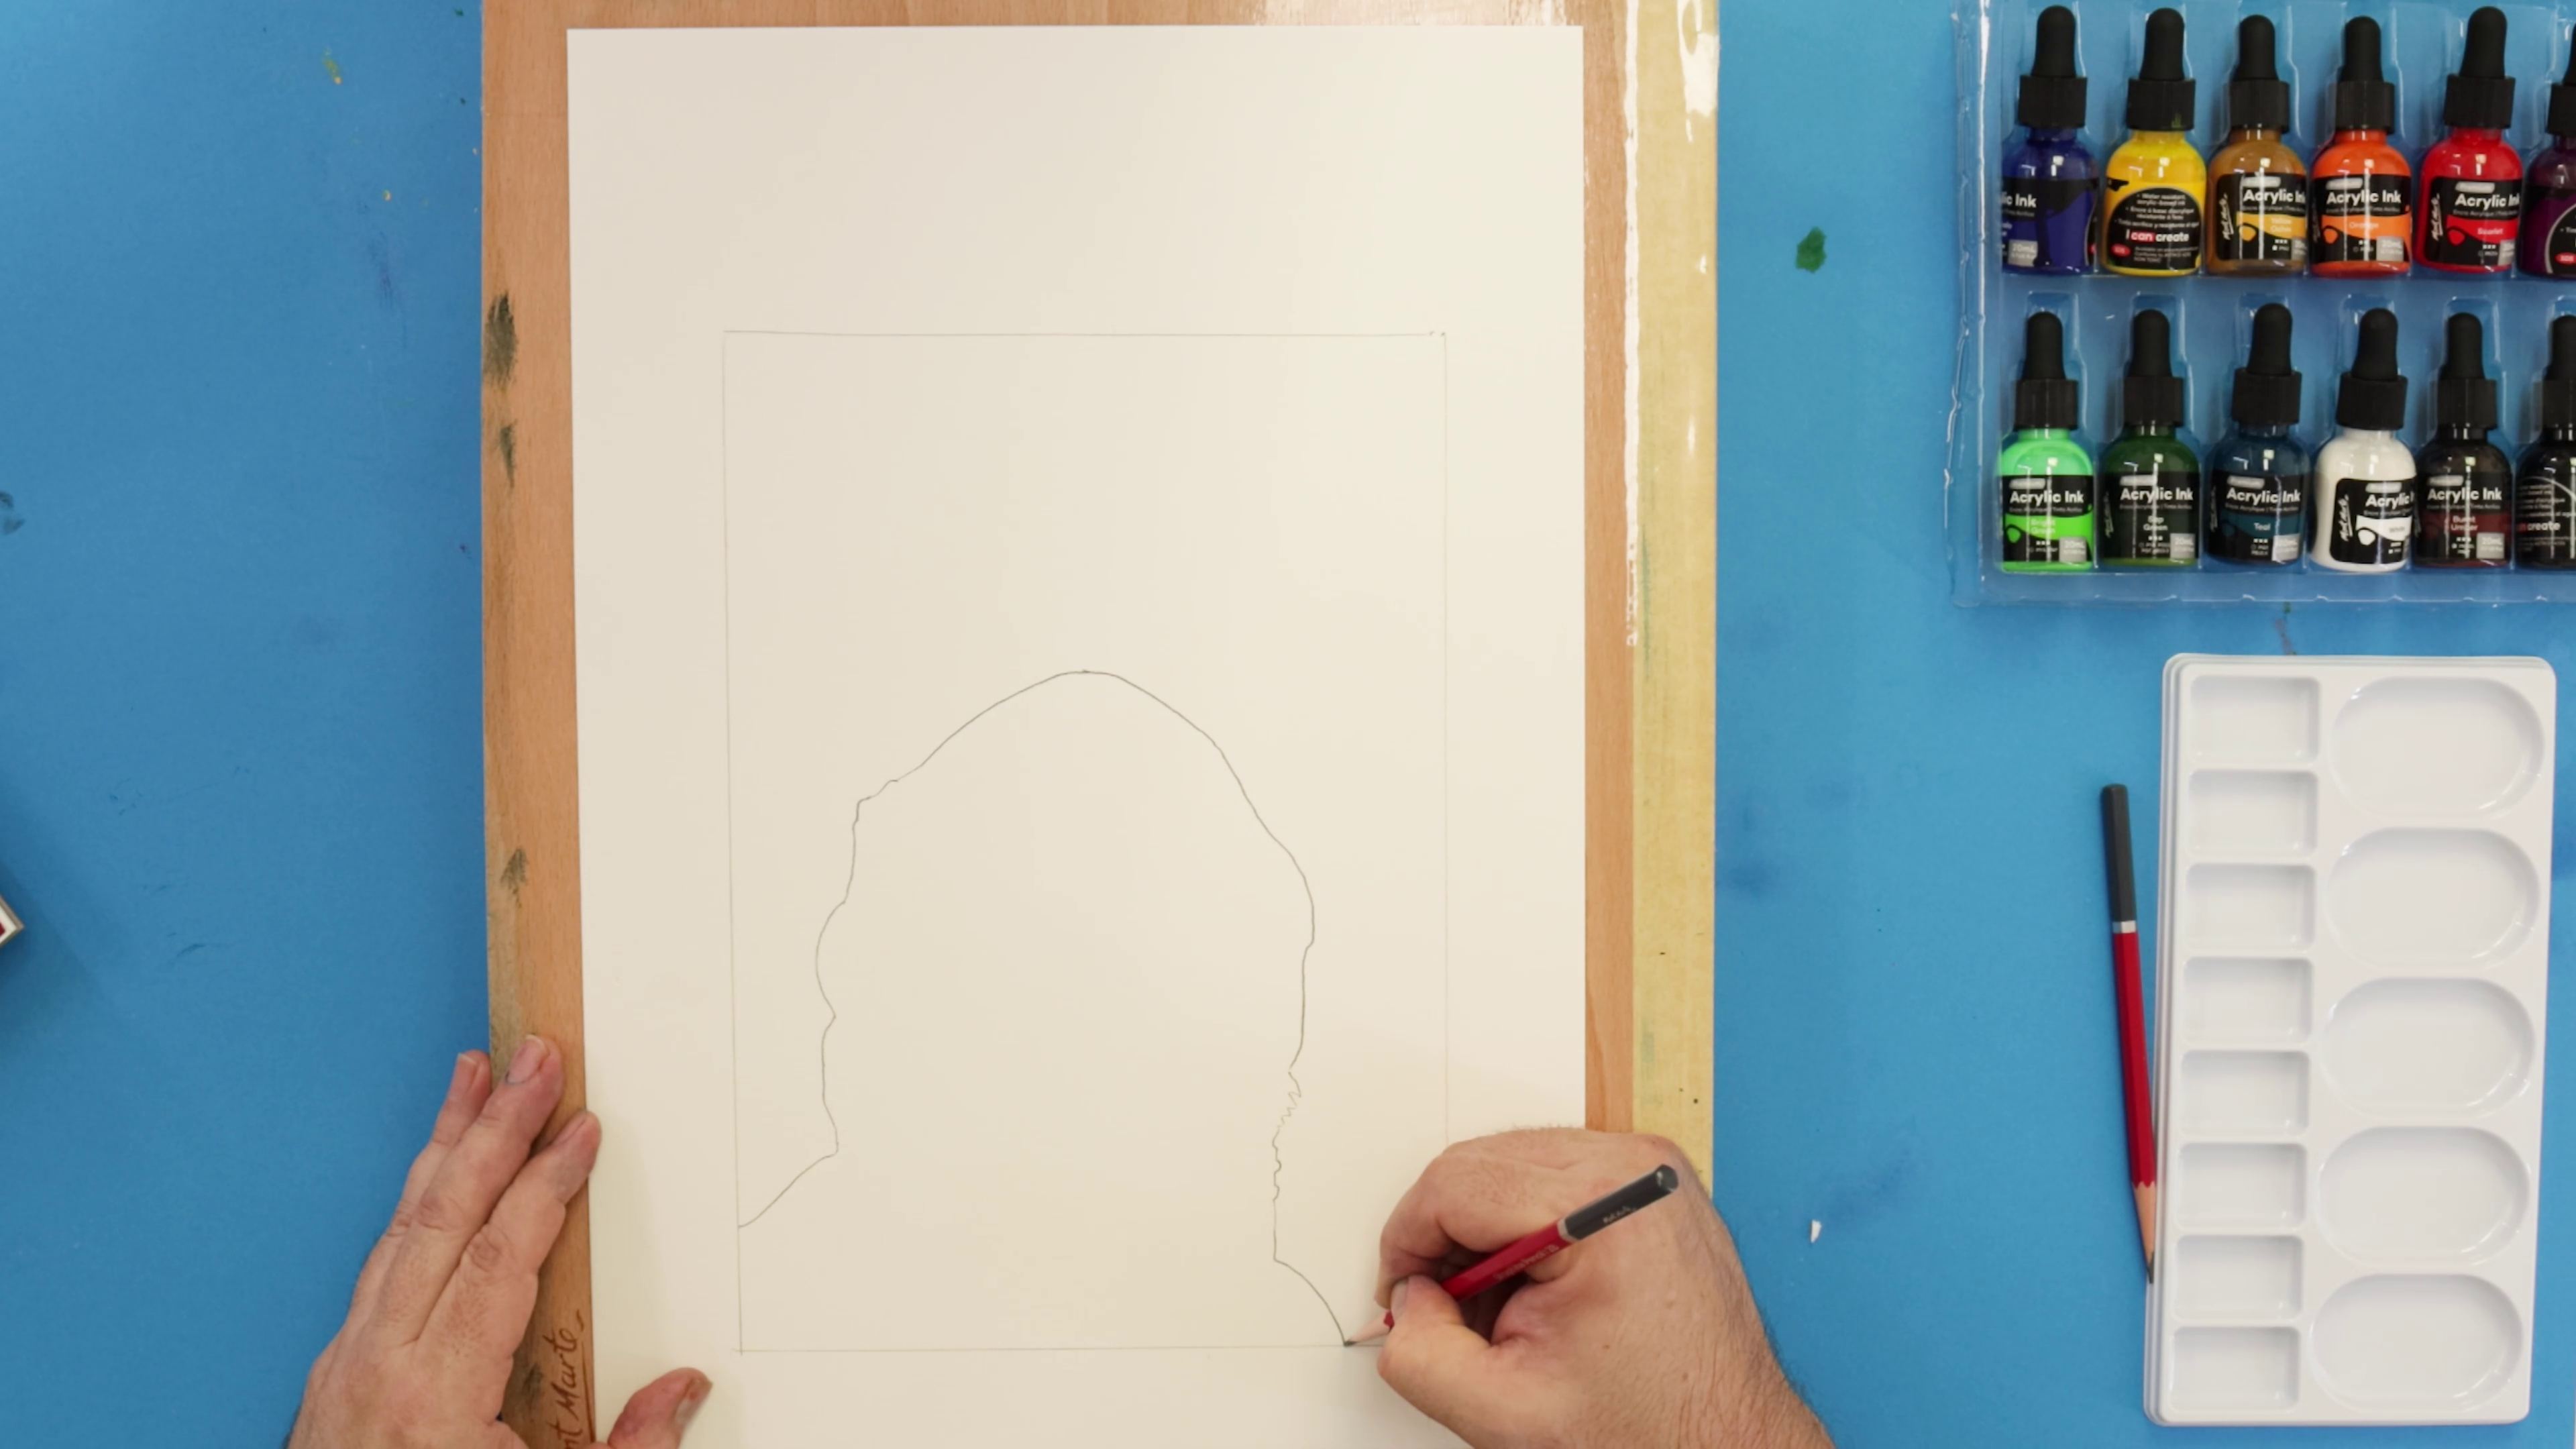
- Use an A3 Mixed Media sheet and tape the edges to isolate an A4 section of the paper
- Print out the reference image and shade the back before tracing over the linework to transfer
- Focus on getting the helmet profile mapped out
- Make sure your proportions are correct before moving forward
Step 2: Priming paper
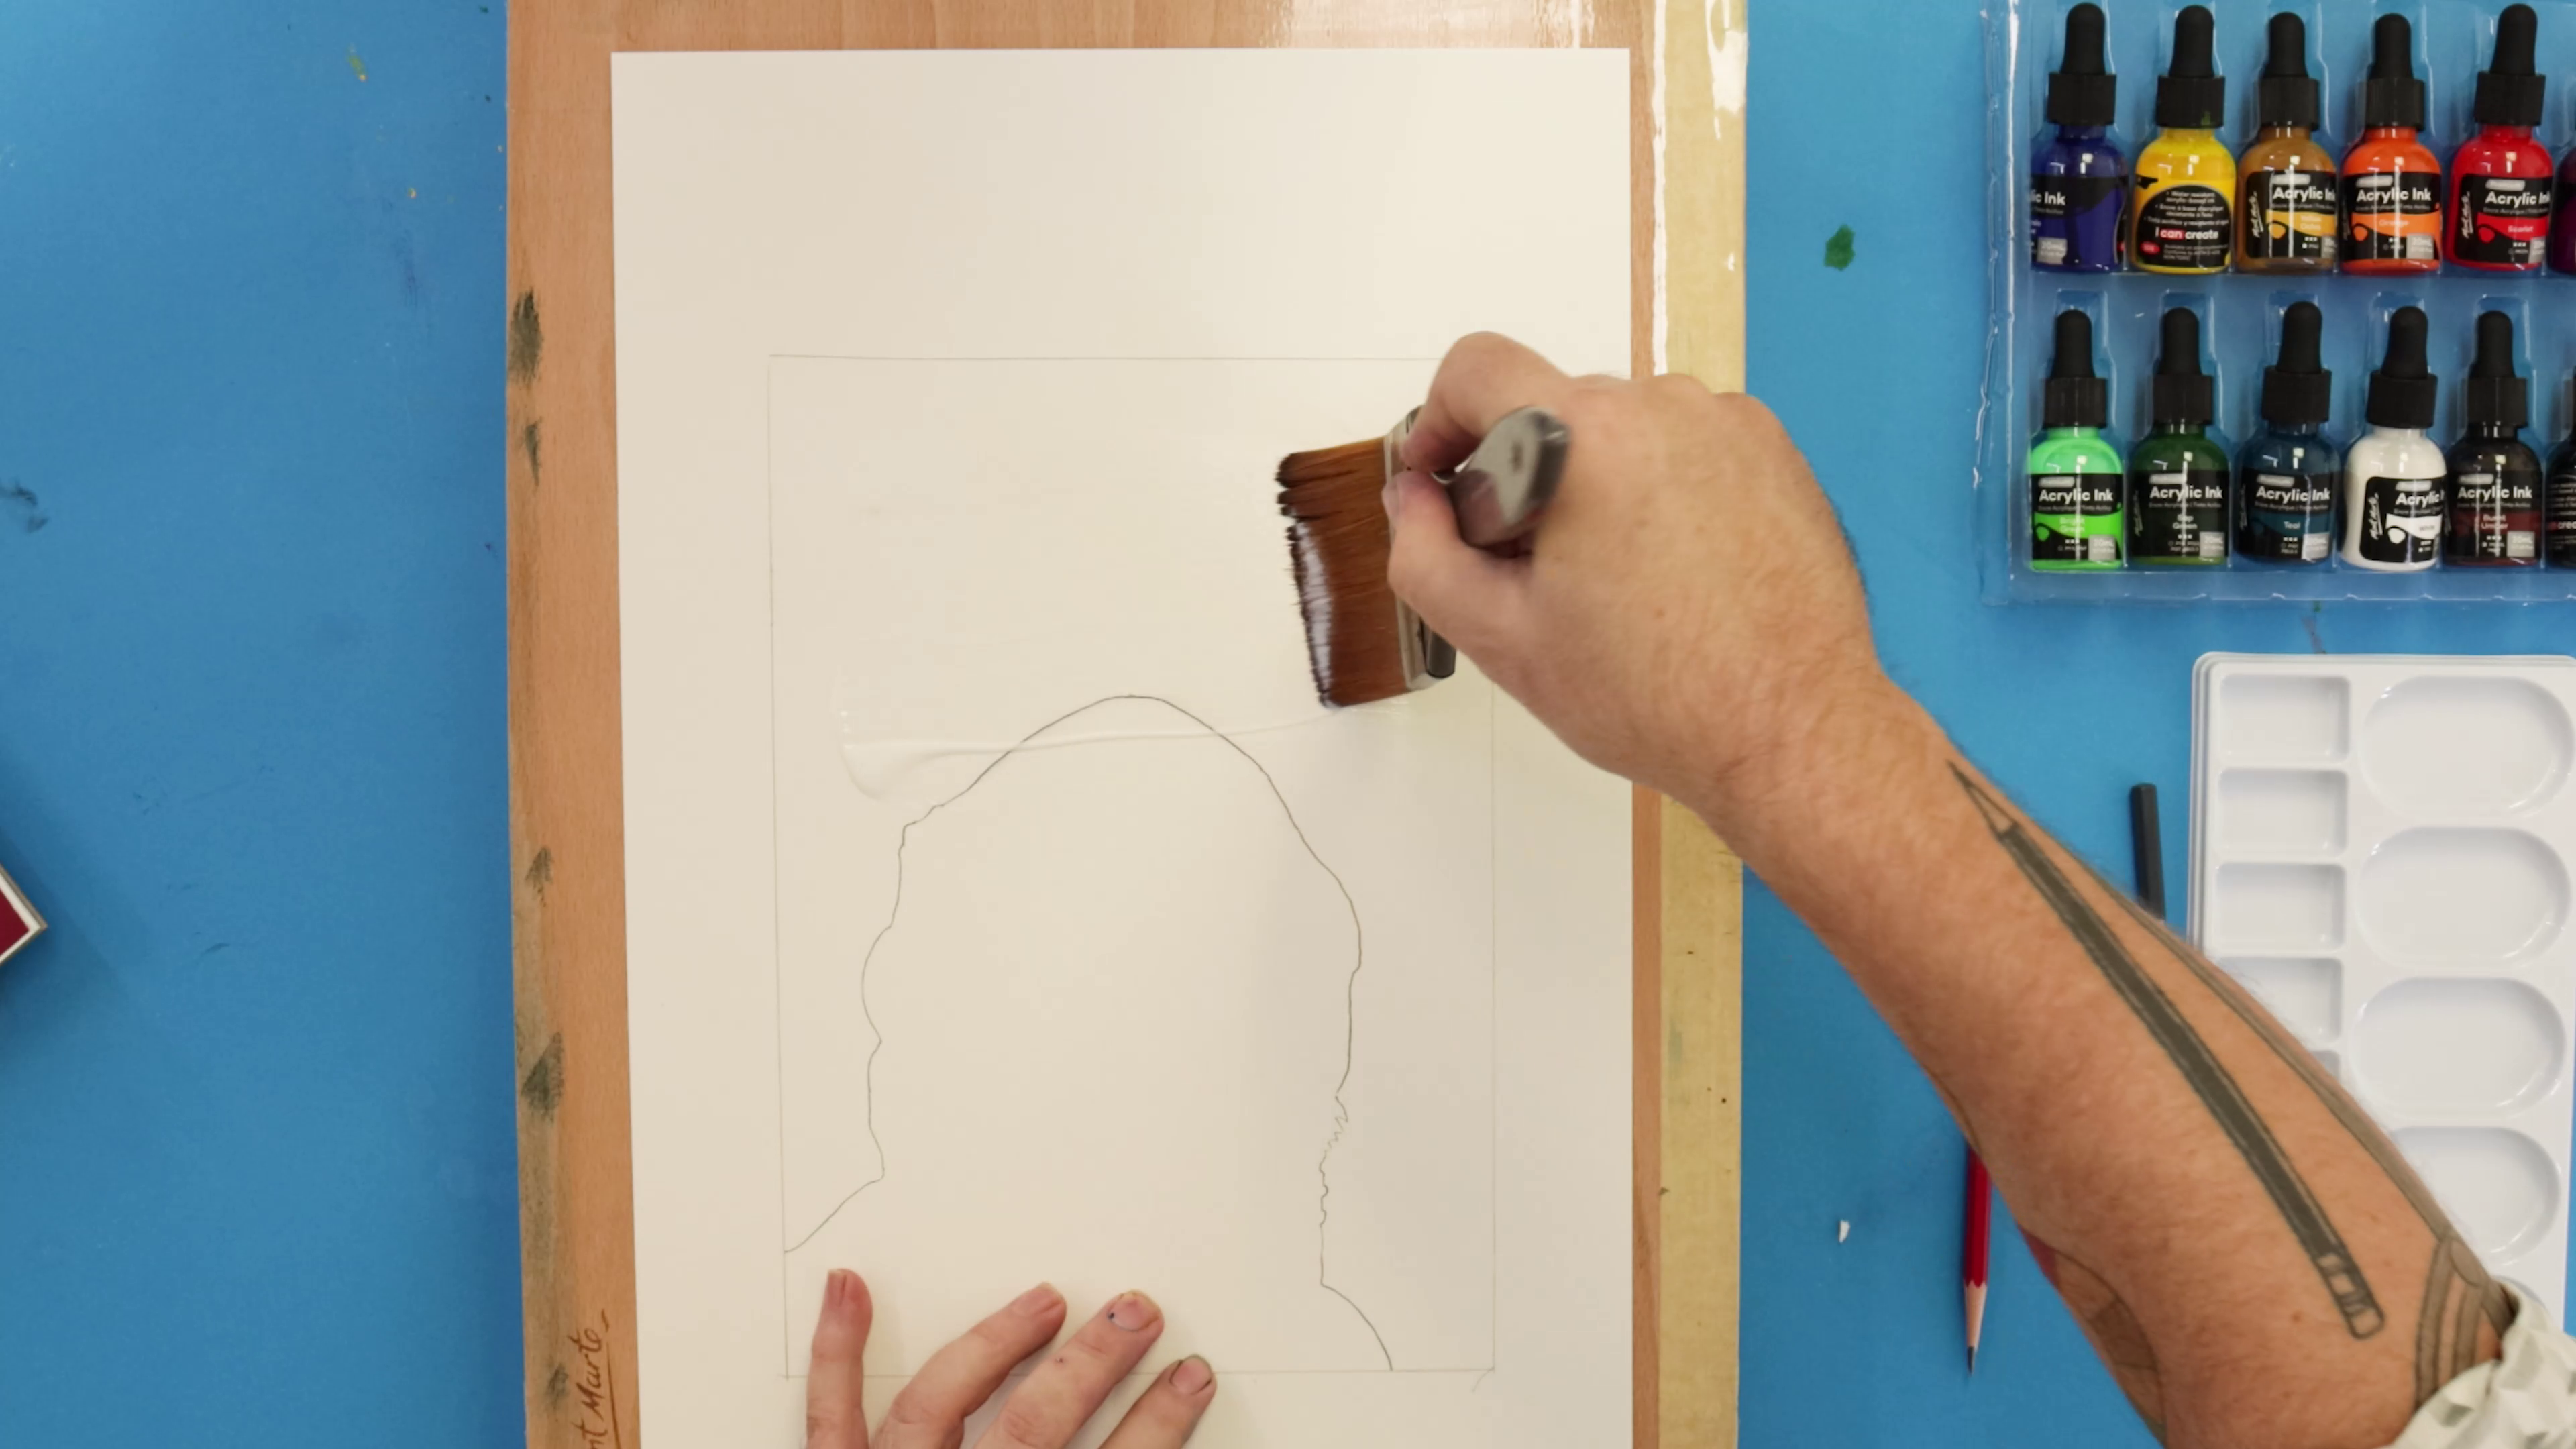
- Squeeze out Acrylic Matt Medium onto the page
- Use the largest brush you have to spread a consistent layer over the whole page
- This helps the paper become more resilient when applying multiple layers of ink
- Tape the edges of the paper to the drawing board with clear, high-quality tape to prevent warping
- Let it dry completely
Step 3: Using masking fluid
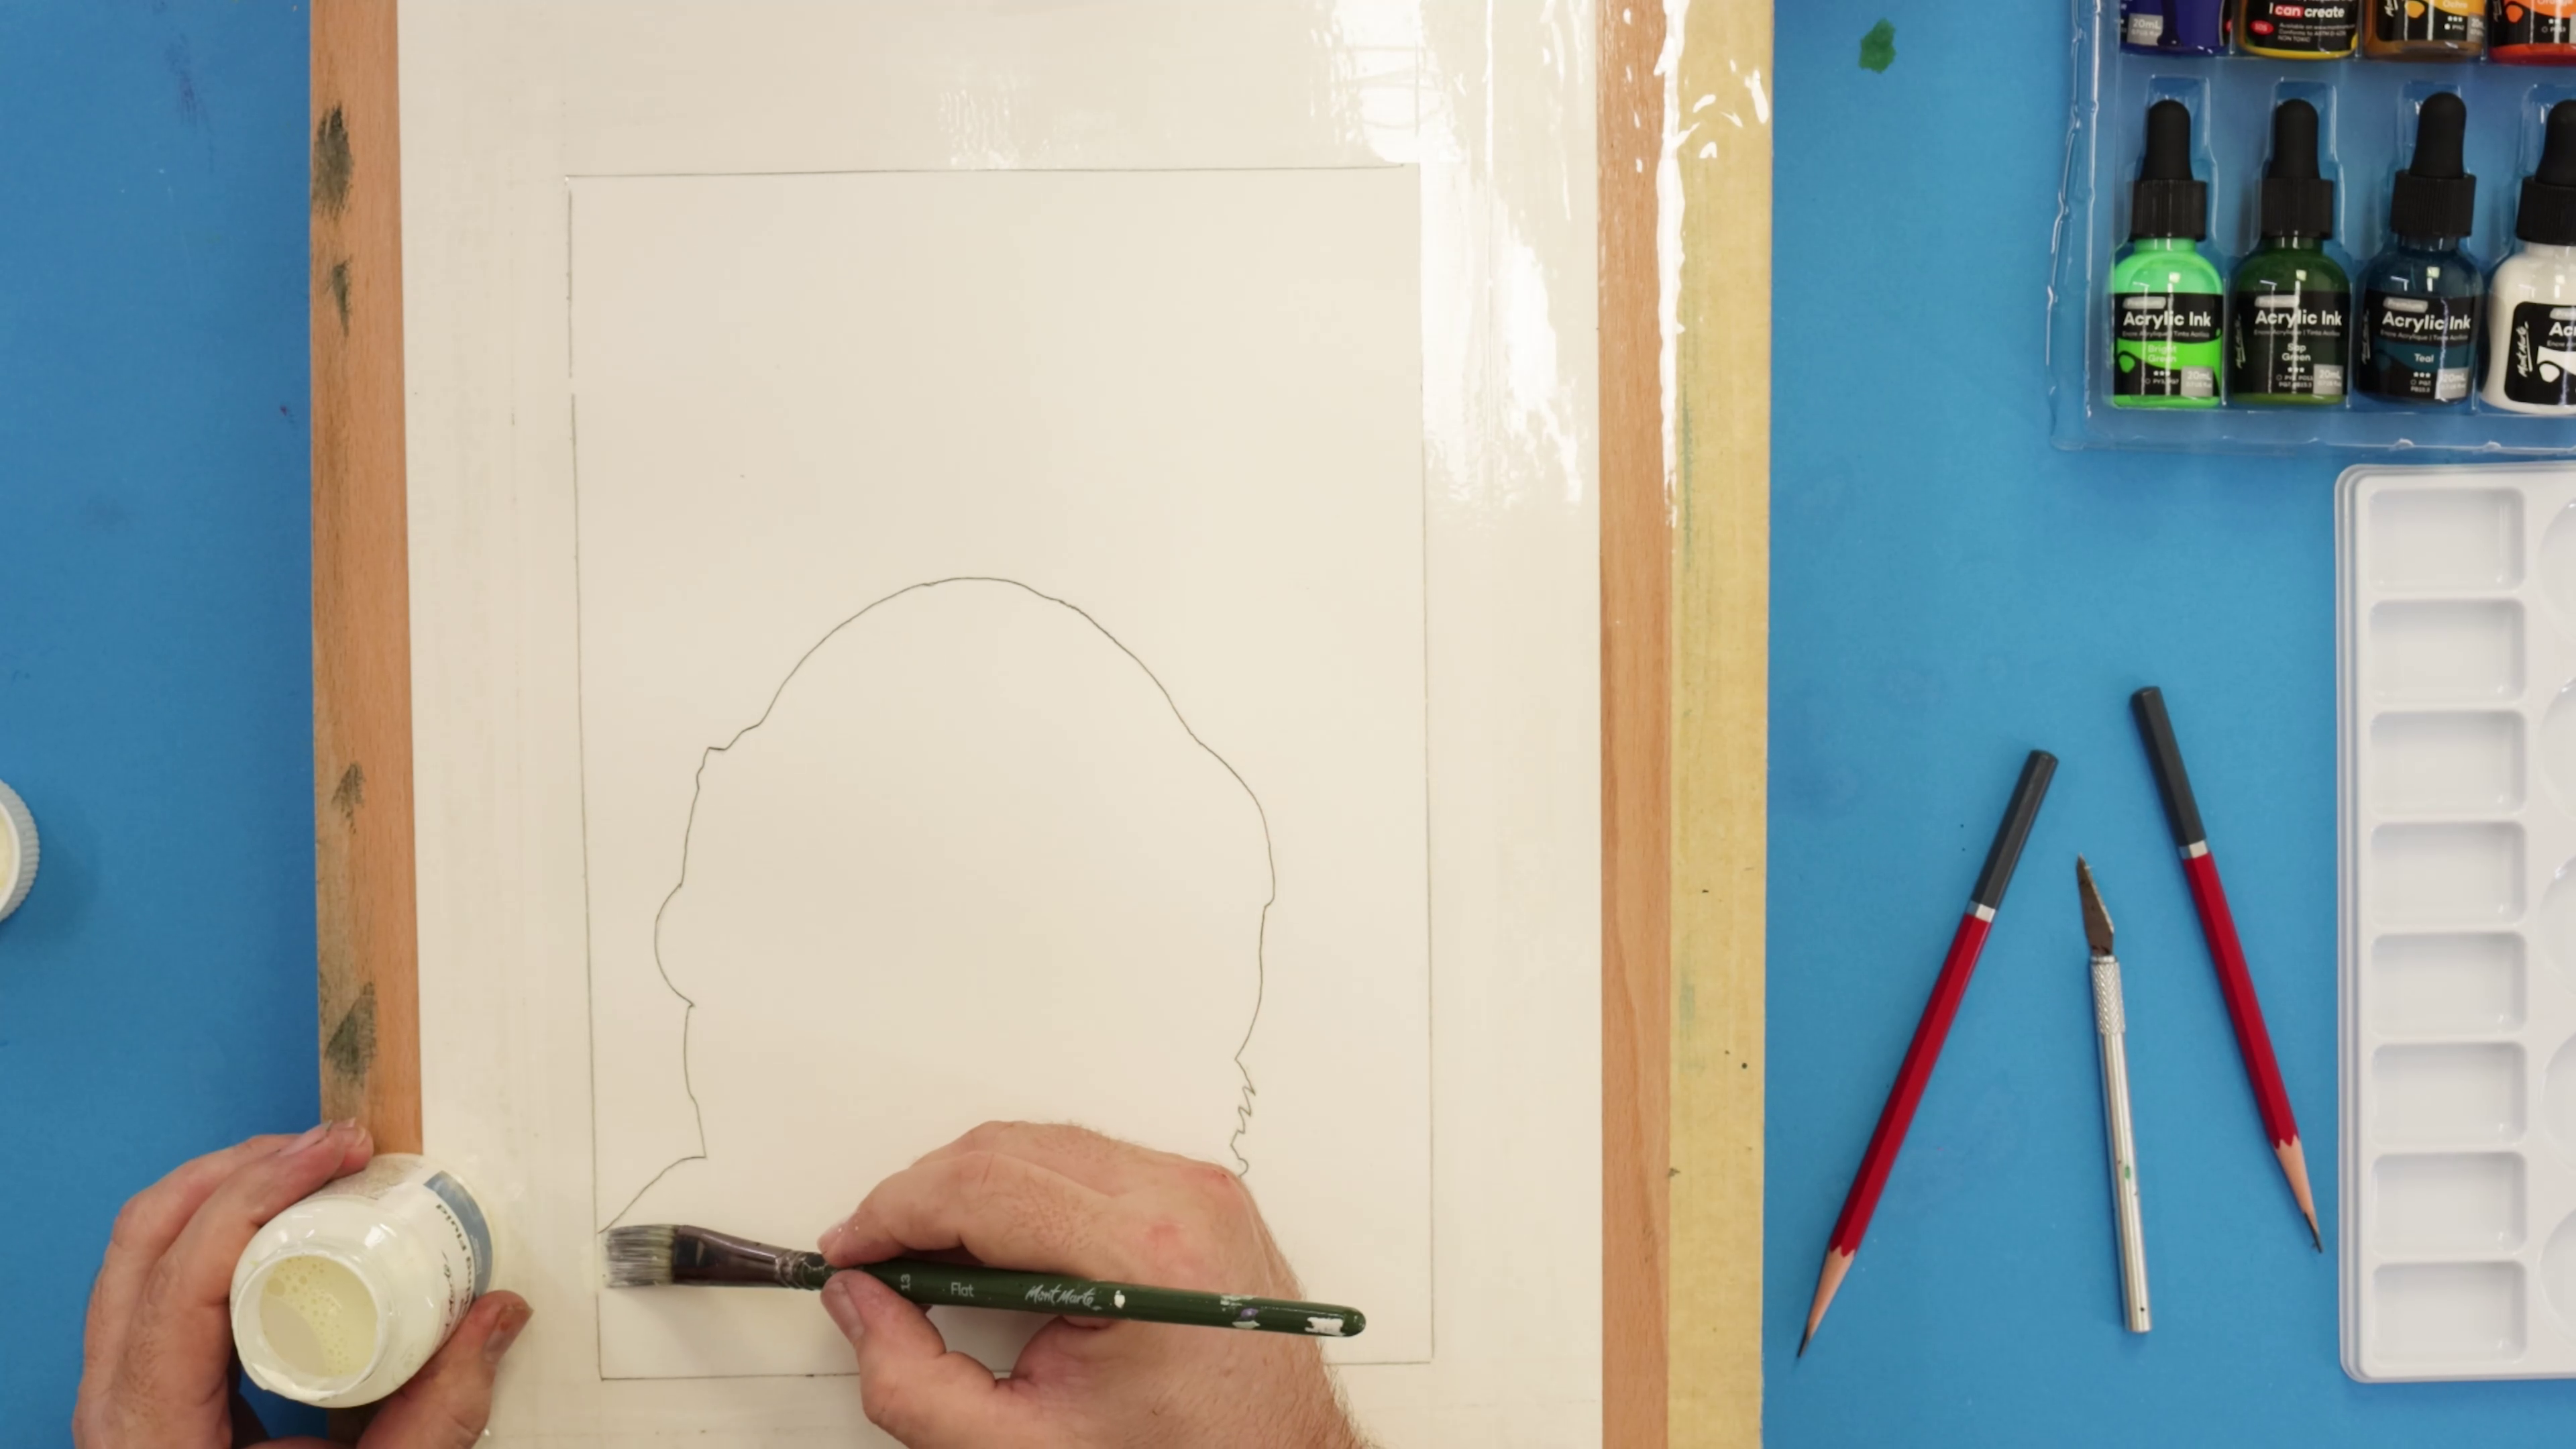
- Use masking fluid to mask out the inside edge of the helmet outline
- Apply with a flat taklon brush, then rinse the brush immediately to avoid damaging it
- This will keep the edges of the helmet clean and sharp as you apply the background
Step 4: Background painting
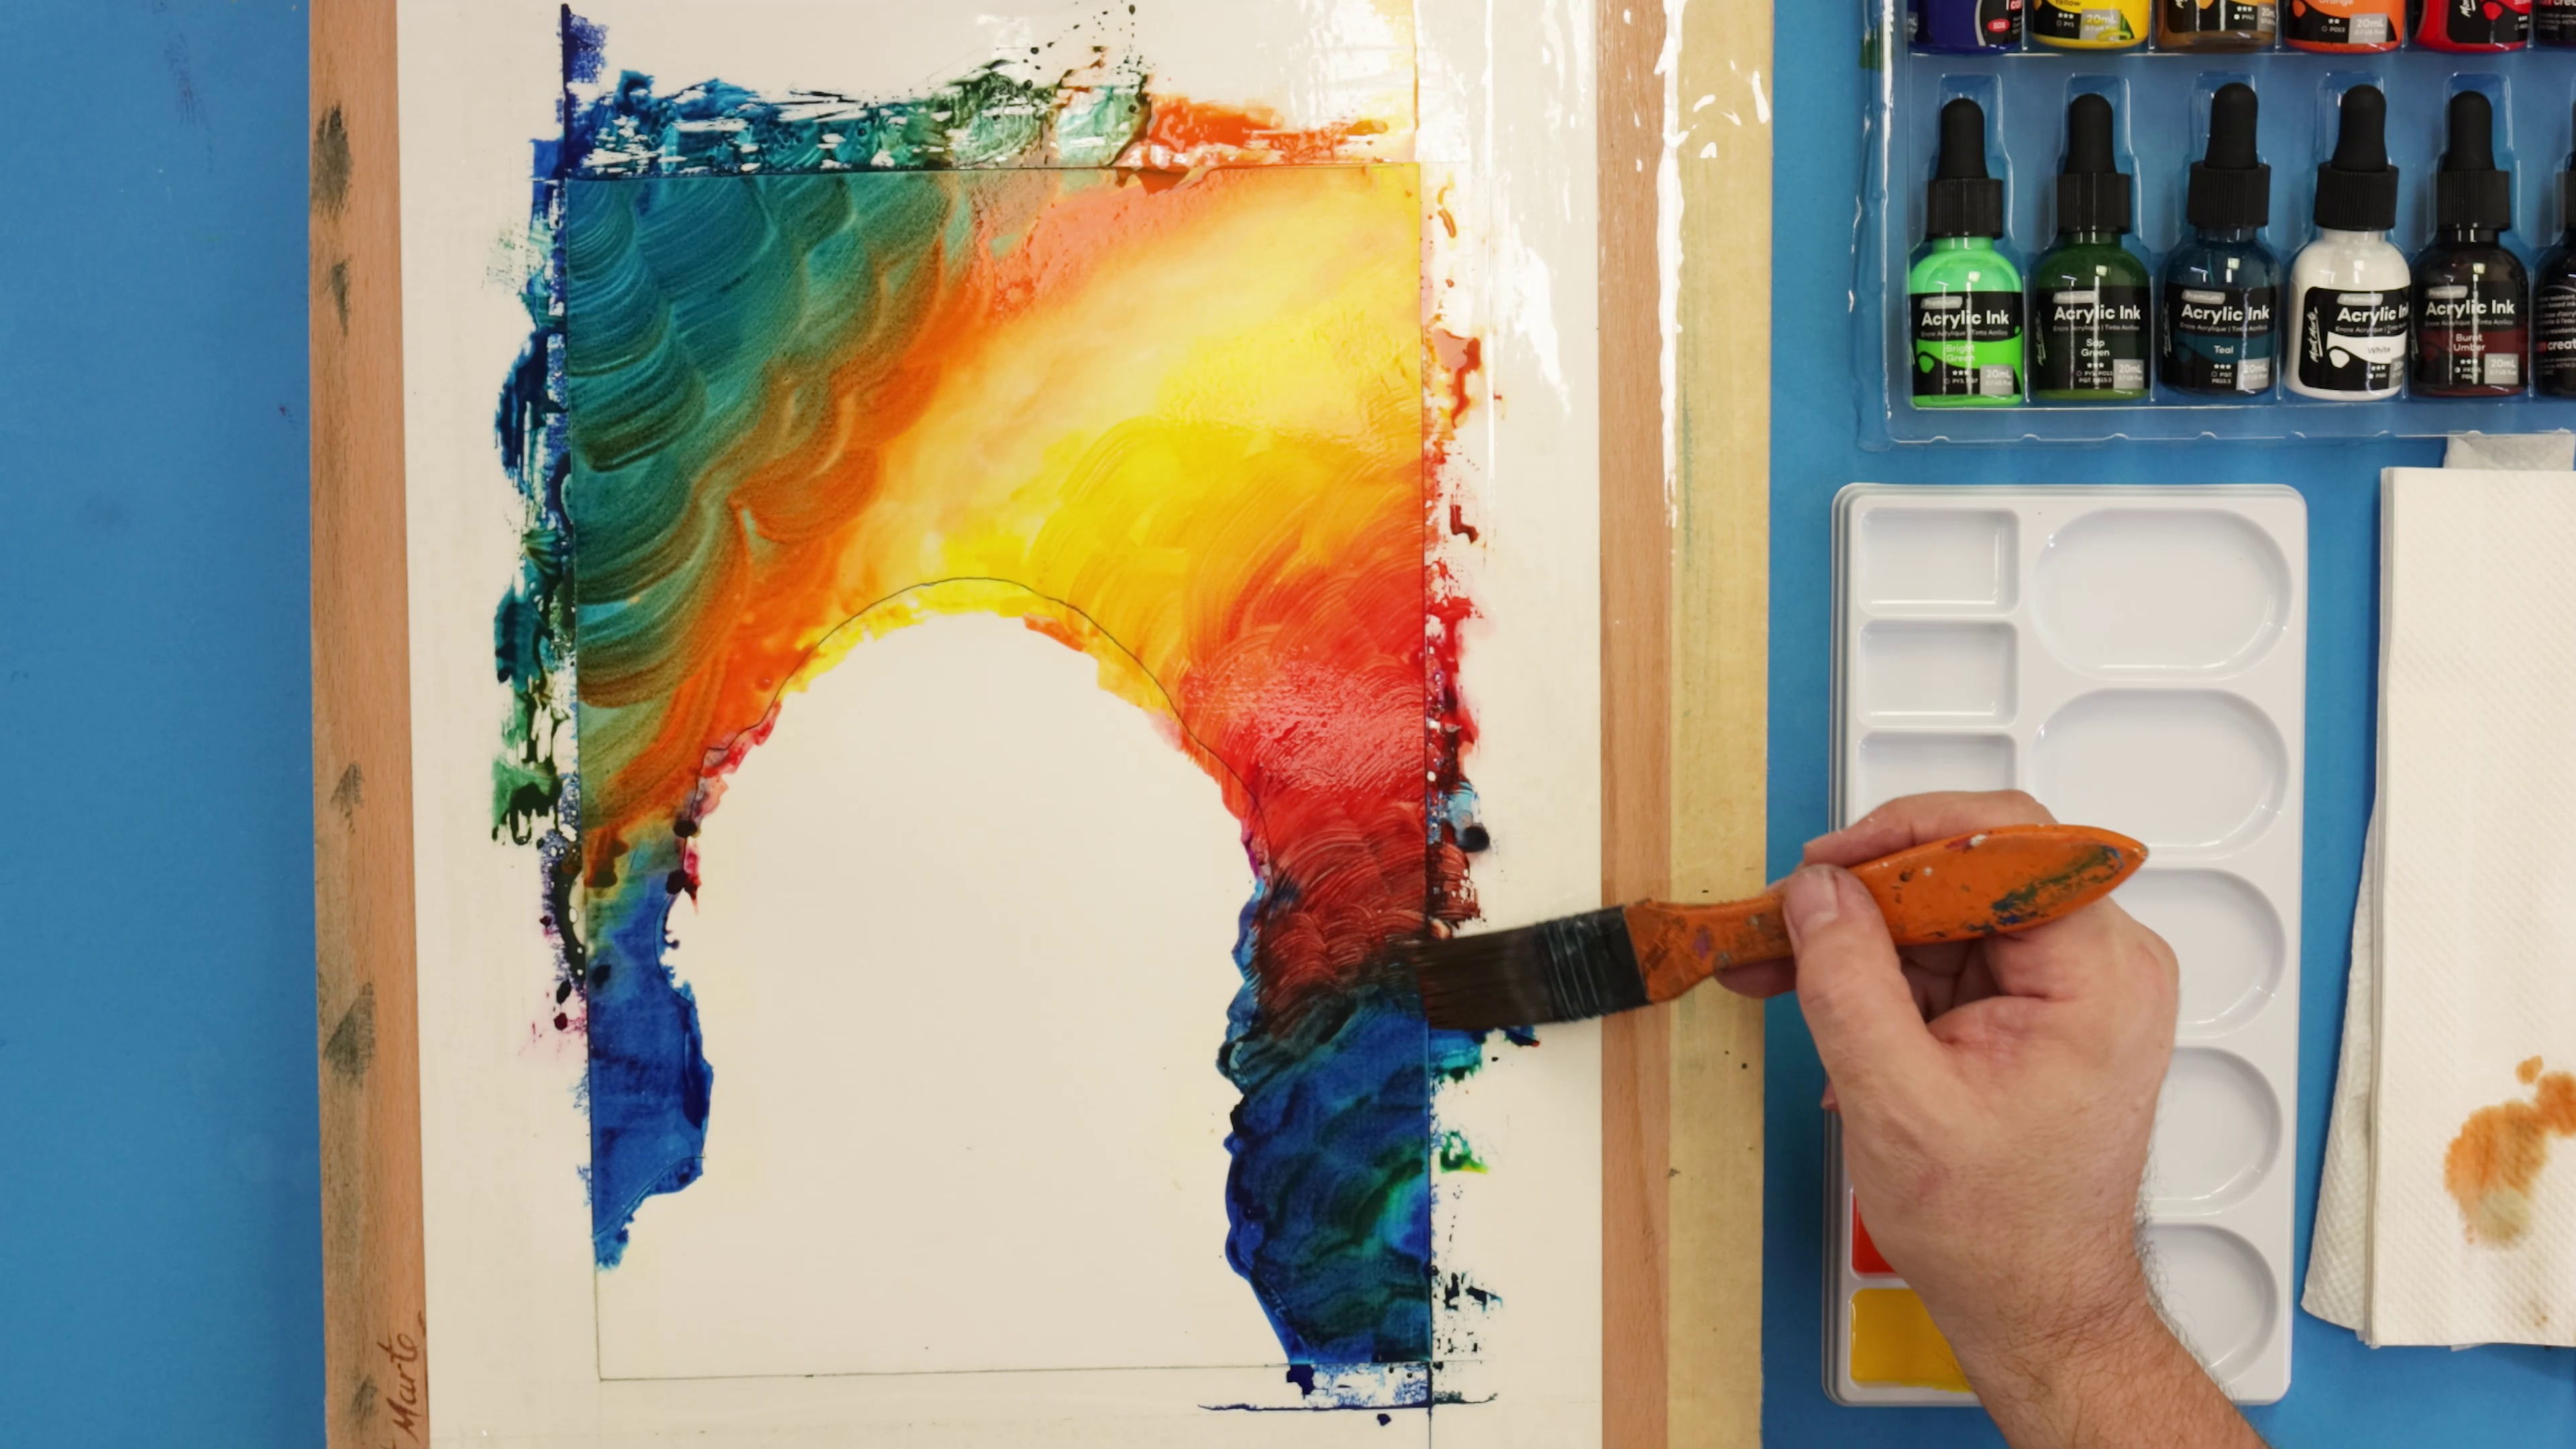
- Begin laying in the background using acrylic inks
- The colours and shape of your galaxy is up for interpretation
- We start with Cadmium Yellow and gradually blend Orange on either side
- Follow with Scarlet, Violet, and Phthalo Blue, blending smoothly with your flat taklon brush
- Soften the transition of colours with a mop brush as needed
- Add additional layers of ink over the background to build depth
- Continue refining the colour transitions until you’re happy with the look
- Let it dry completely
Step 5: How to paint stars
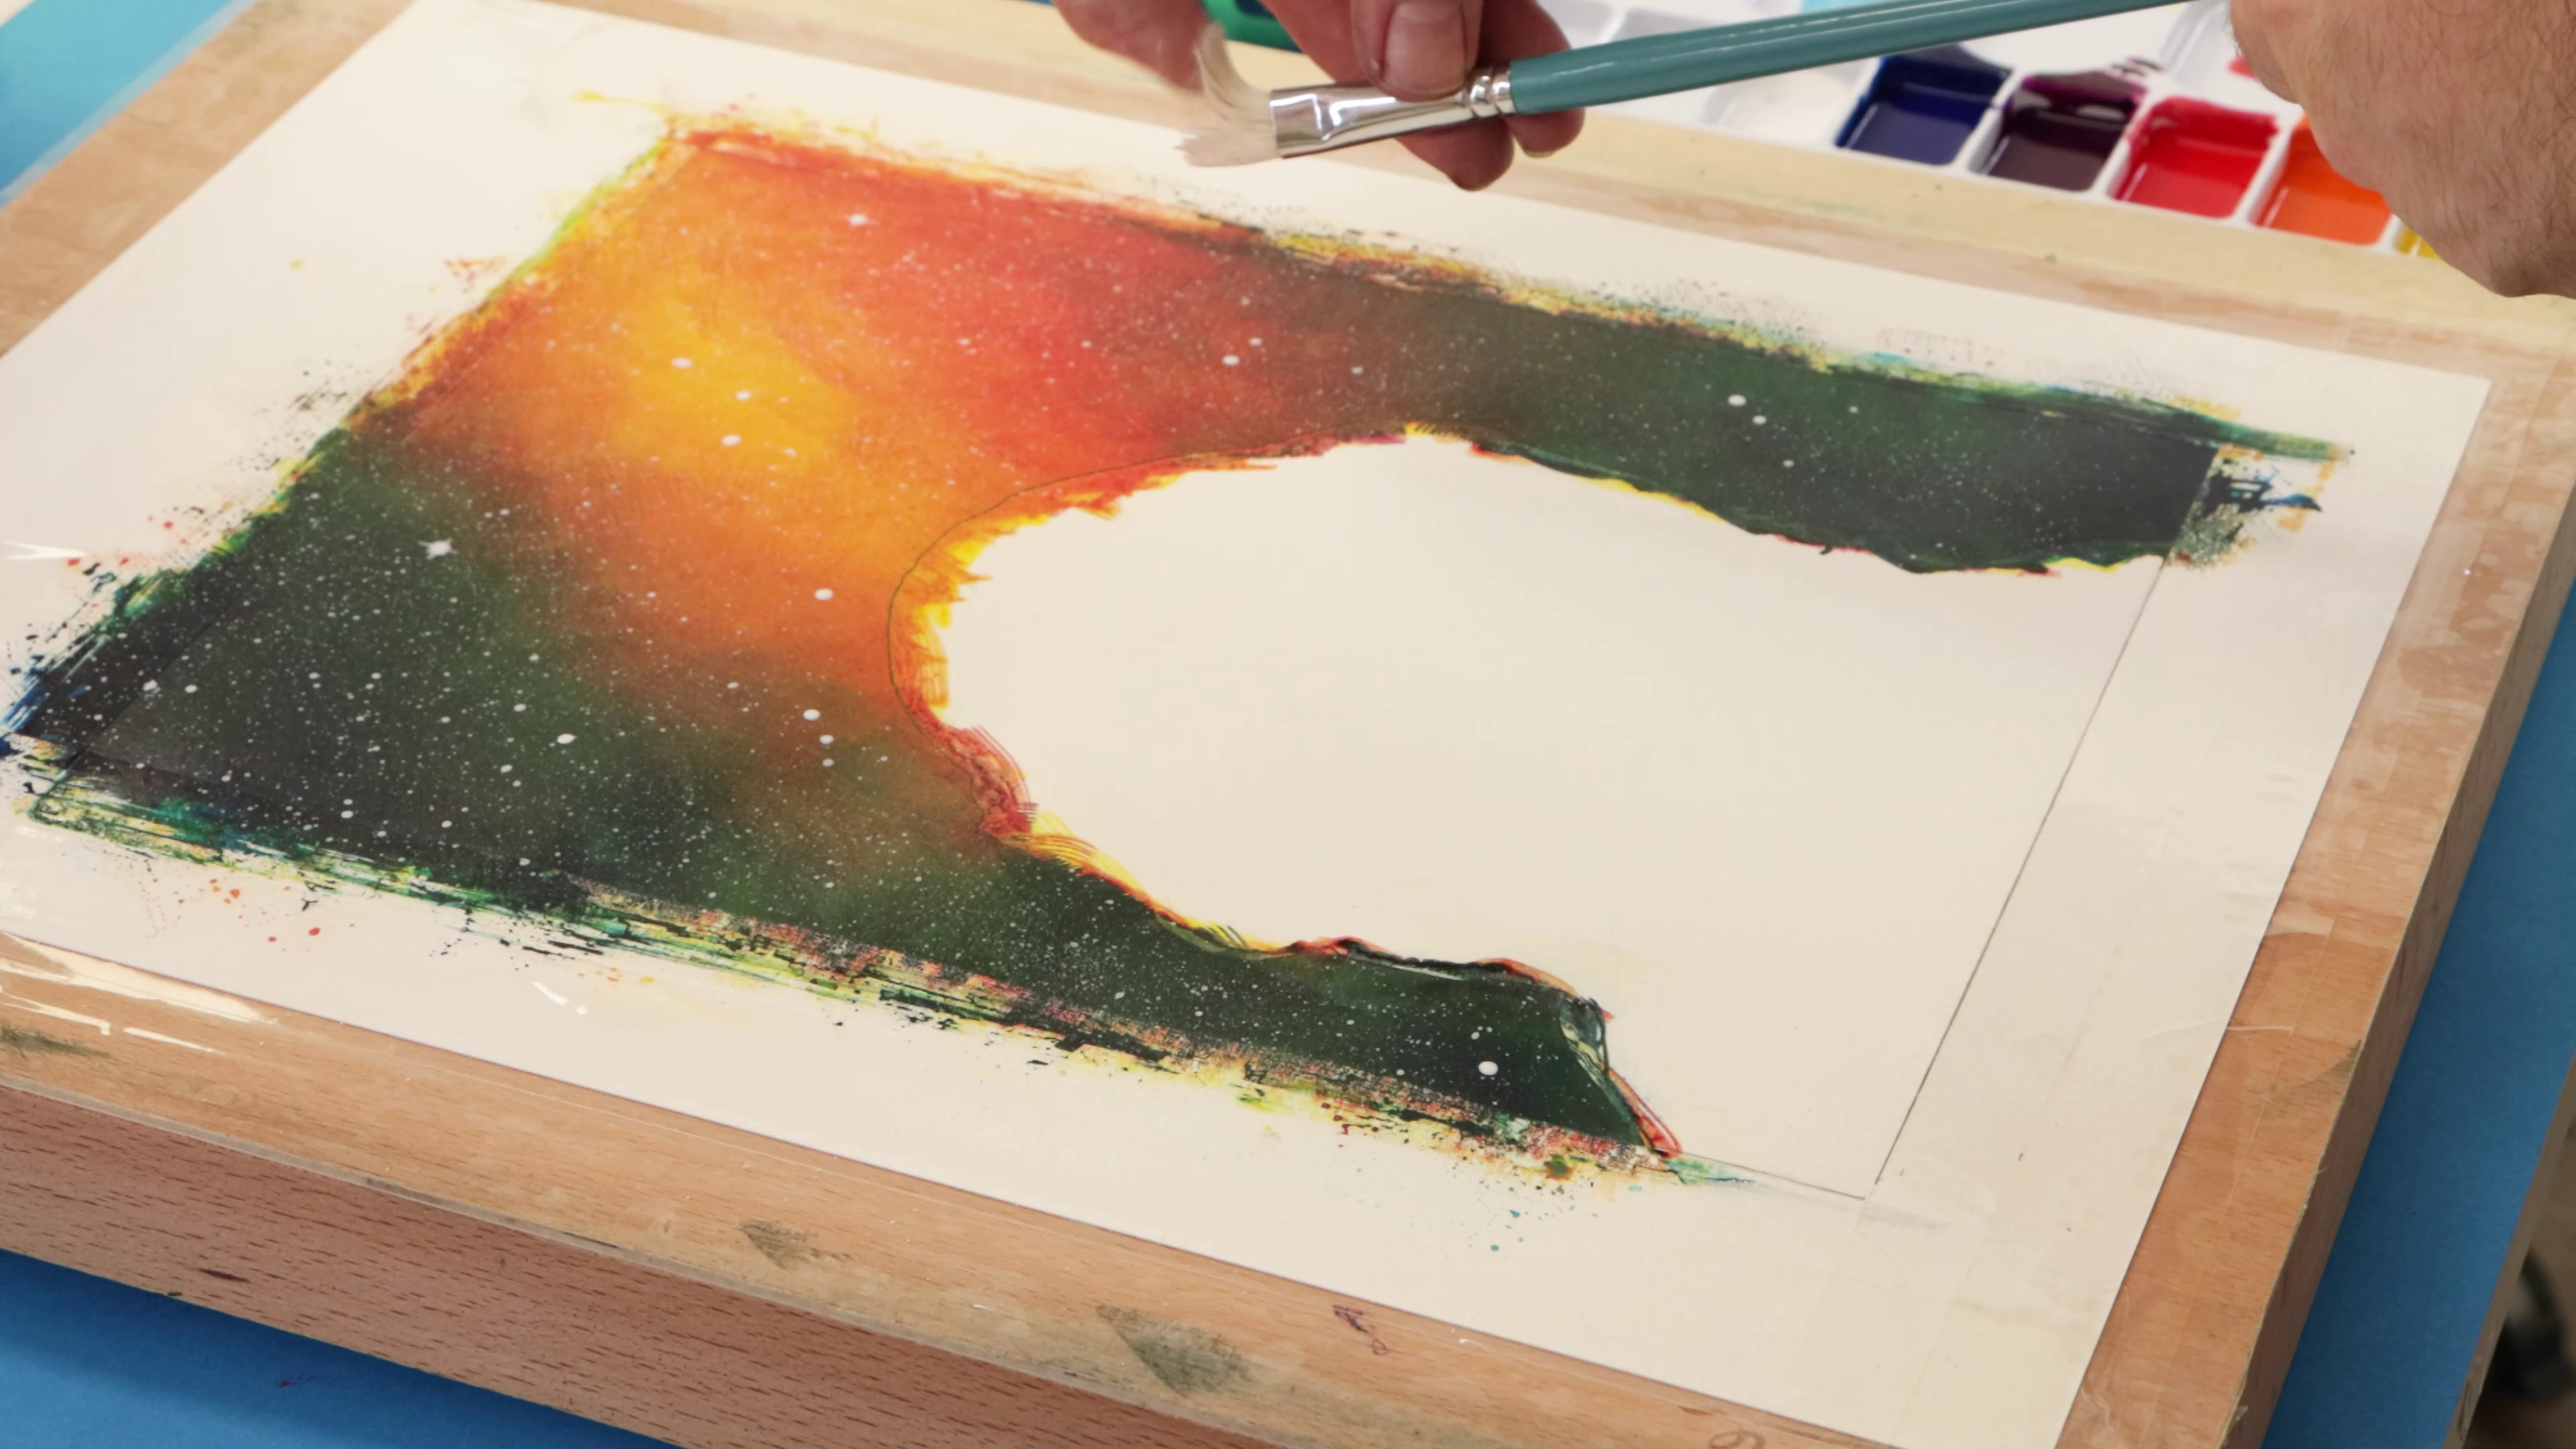
- Pour some white acrylic ink onto a palette
- Use a hog bristle brush to flick the paint onto the background to create stars
- Let the stars dry
Step 6: How to remove masking fluid
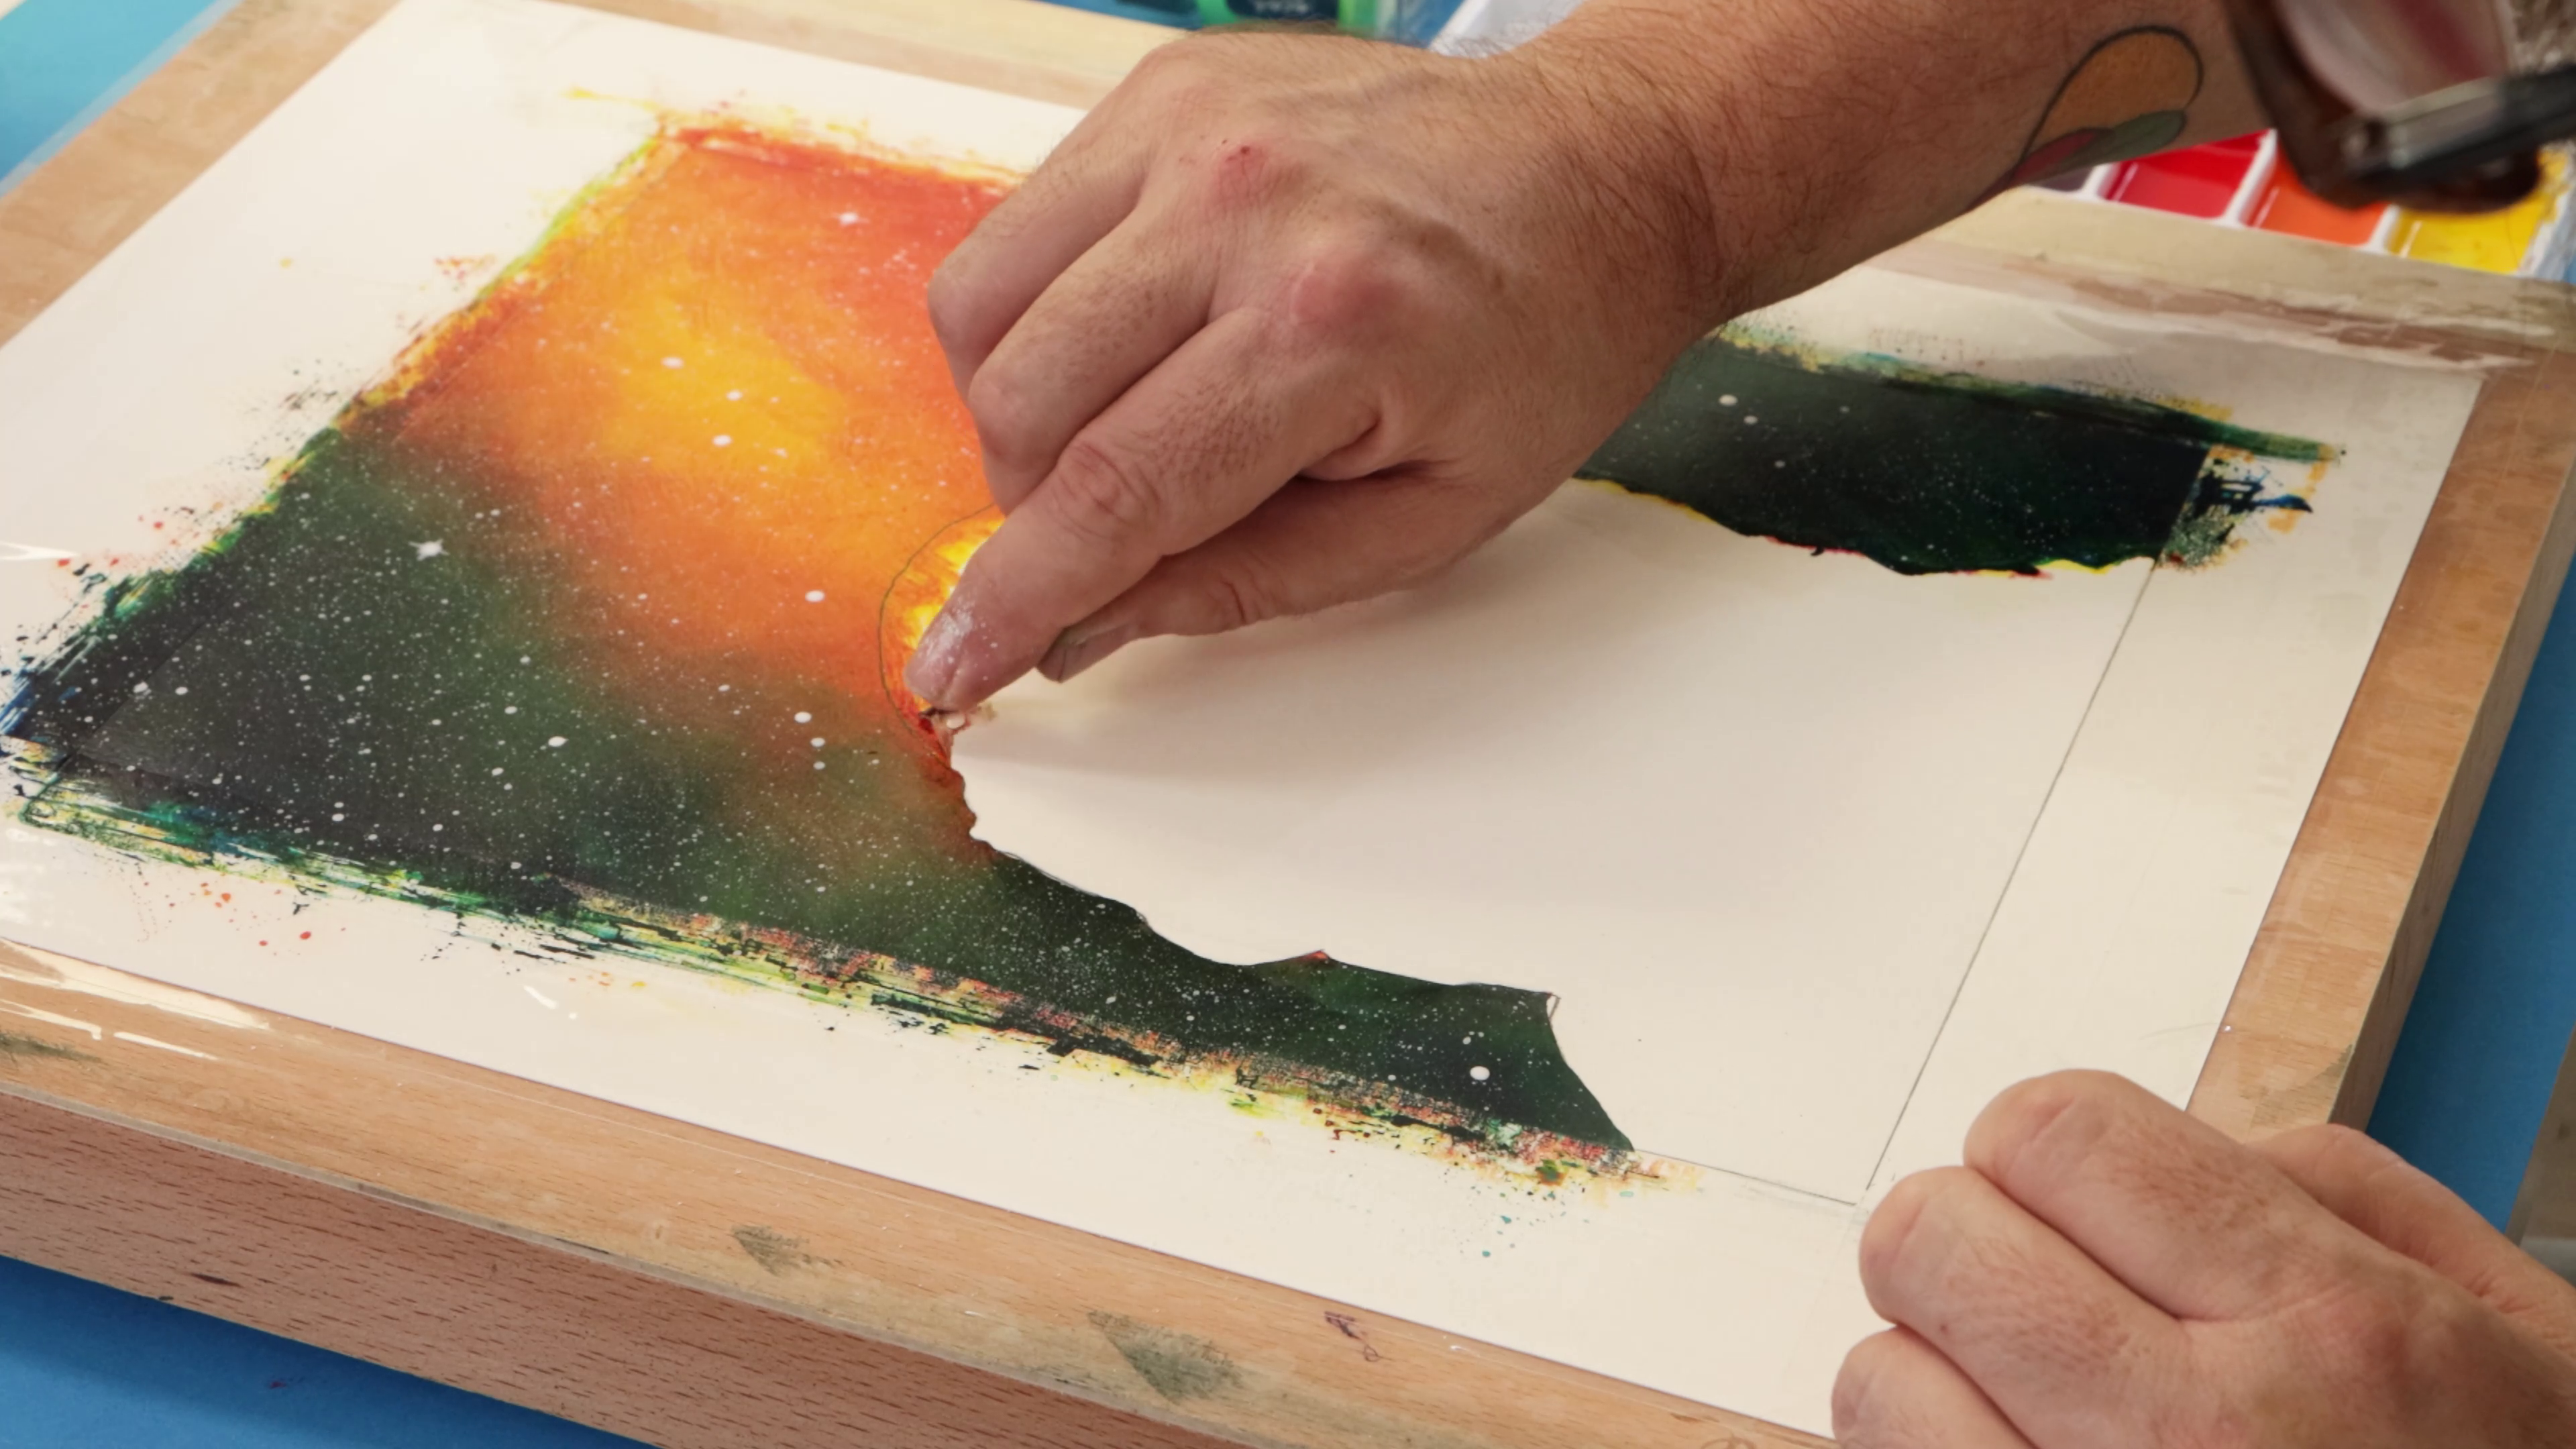
- Once the background is dry, gently peel off the masking fluid using your fingers
- This will reveal the clean outline of the helmet
Step 7: How to draw the cat
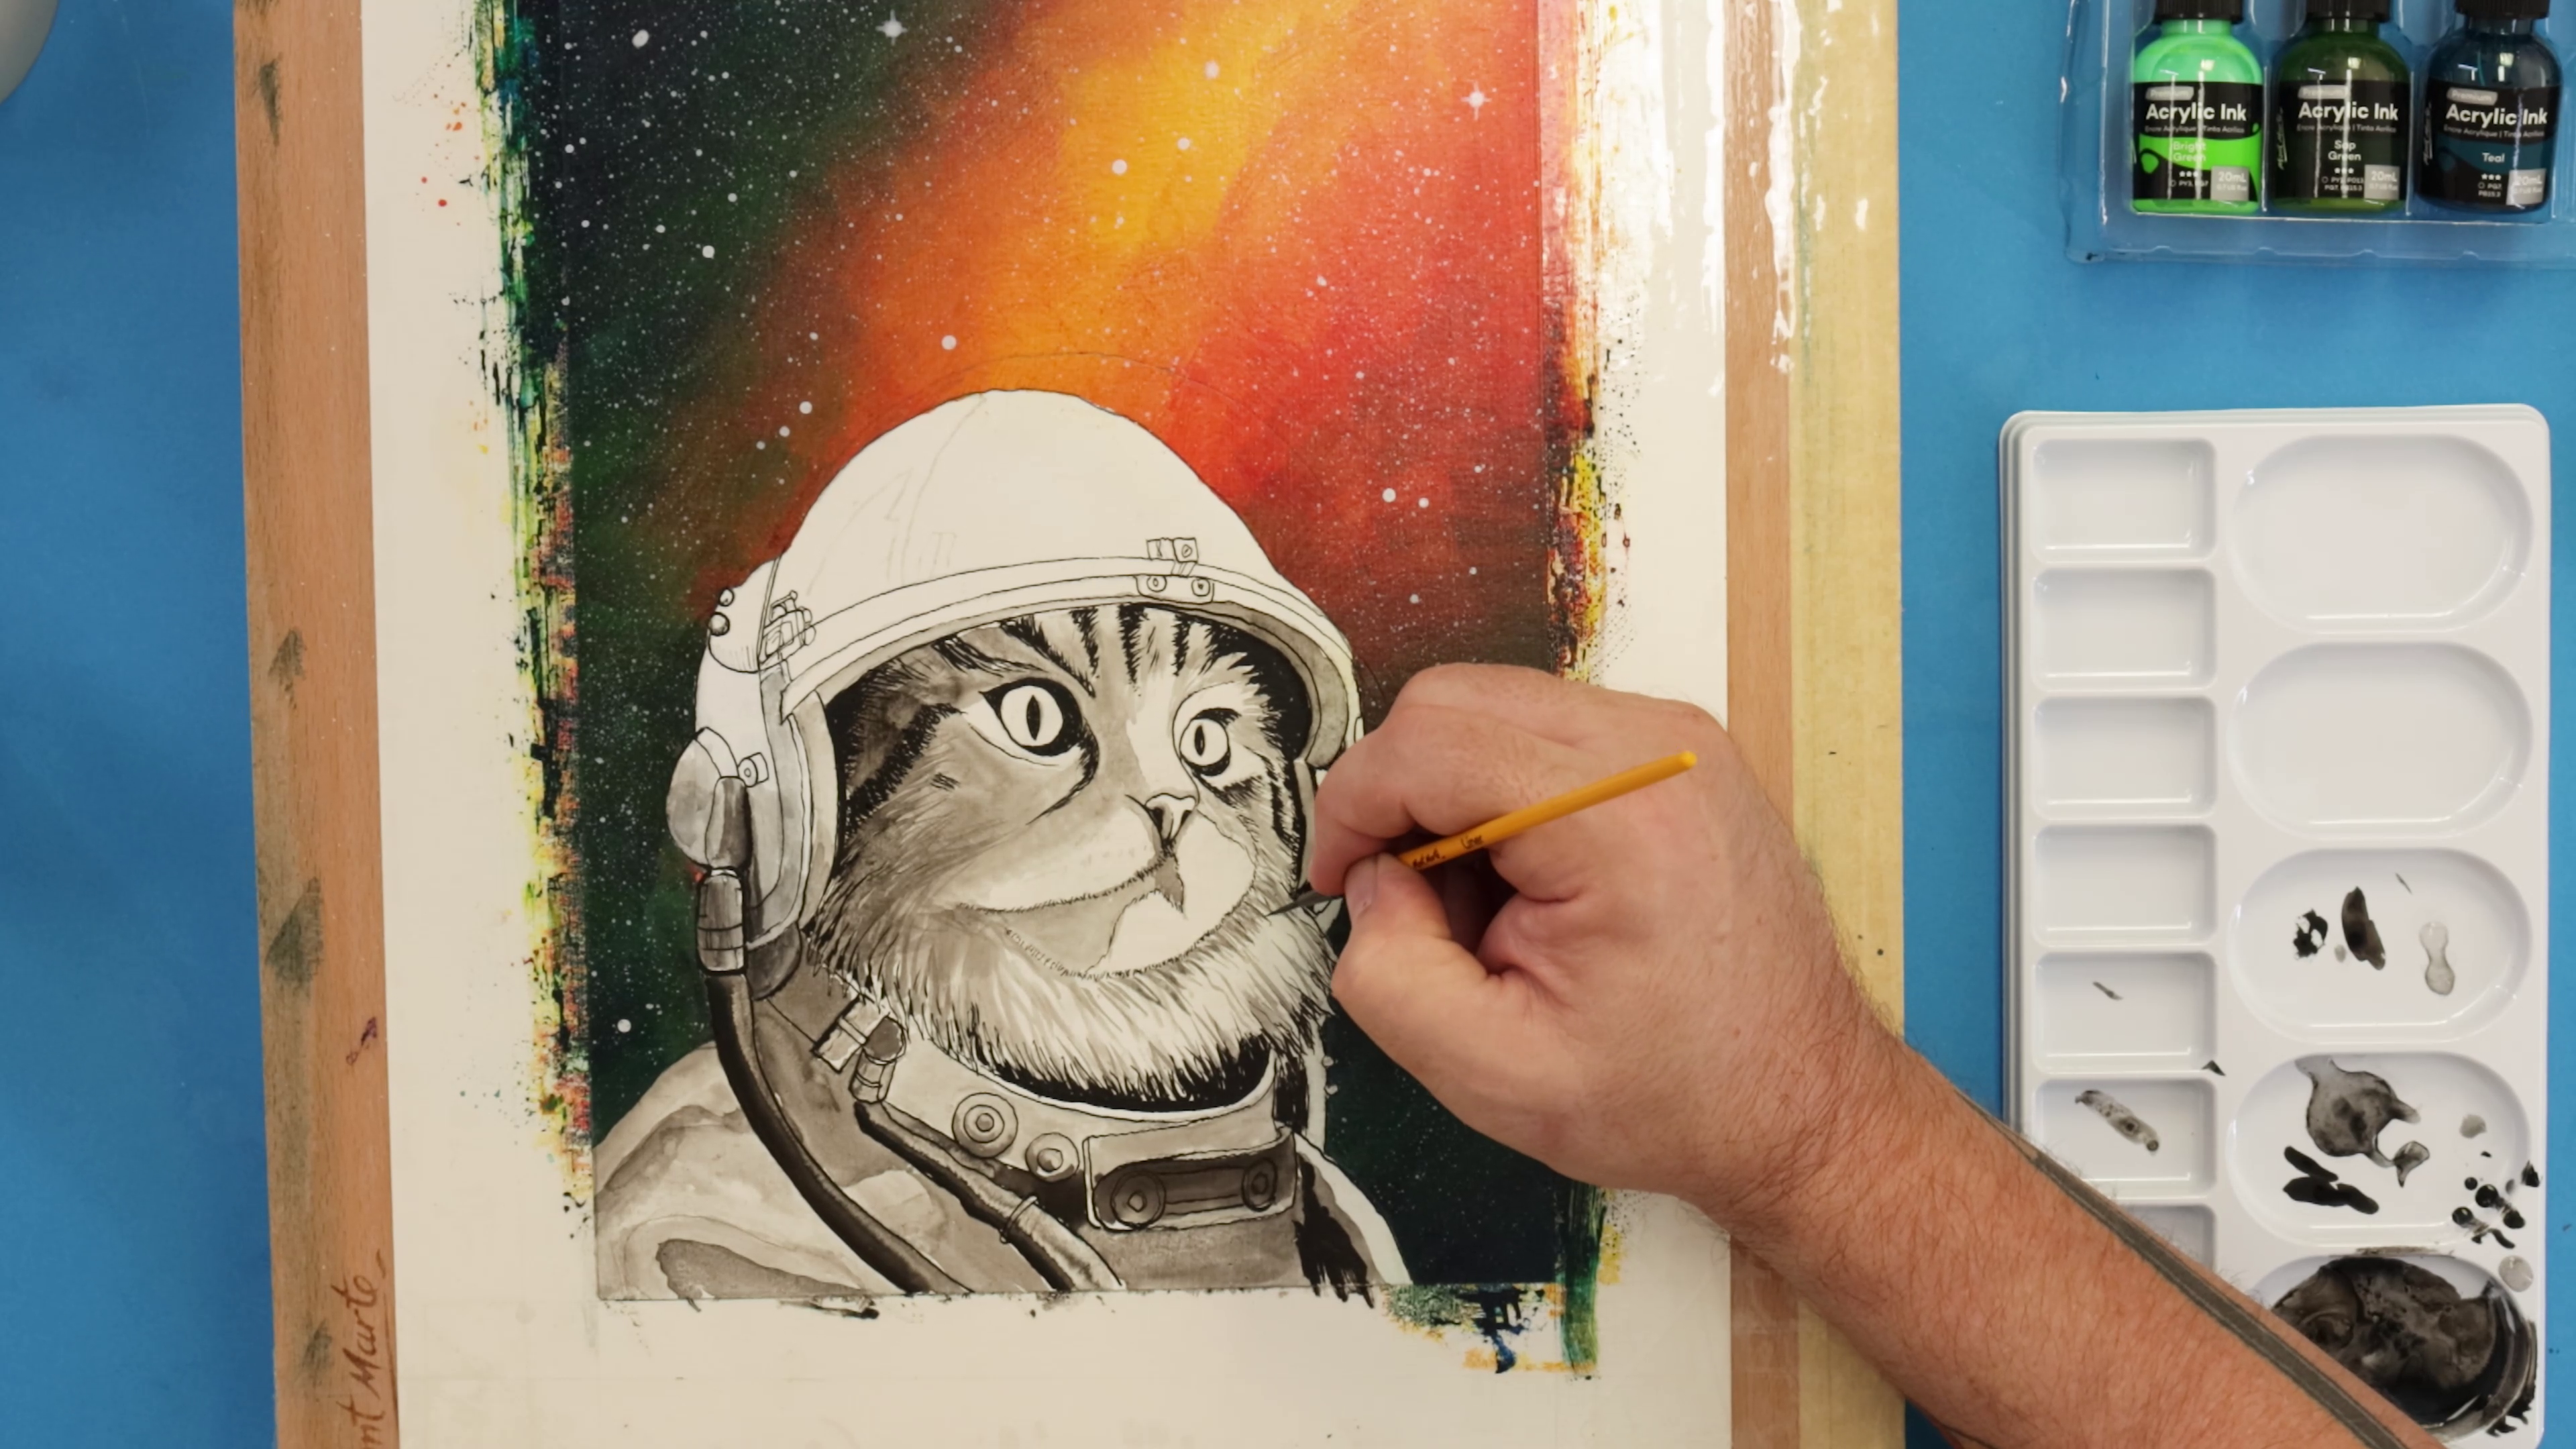
- Refer to the reference image and carefully draw the details of the cat with a sharp pencil
- Make sure to capture key elements like the face, ears, and suit details
- Fill a small vessel with black ink
- Use a dipper pen with the 003 nib to redraw the line work over the pencil drawing
- Focus on outlining the helmet, suit, and other key details
- Add deep shadows and any dark stripes on the cat
- To create lighter tones, dilute the black ink with water to make washes
- Apply the washes with a liner brush for smaller areas and a mop brush for larger blocks of colour
Step 8: How to paint a helmet
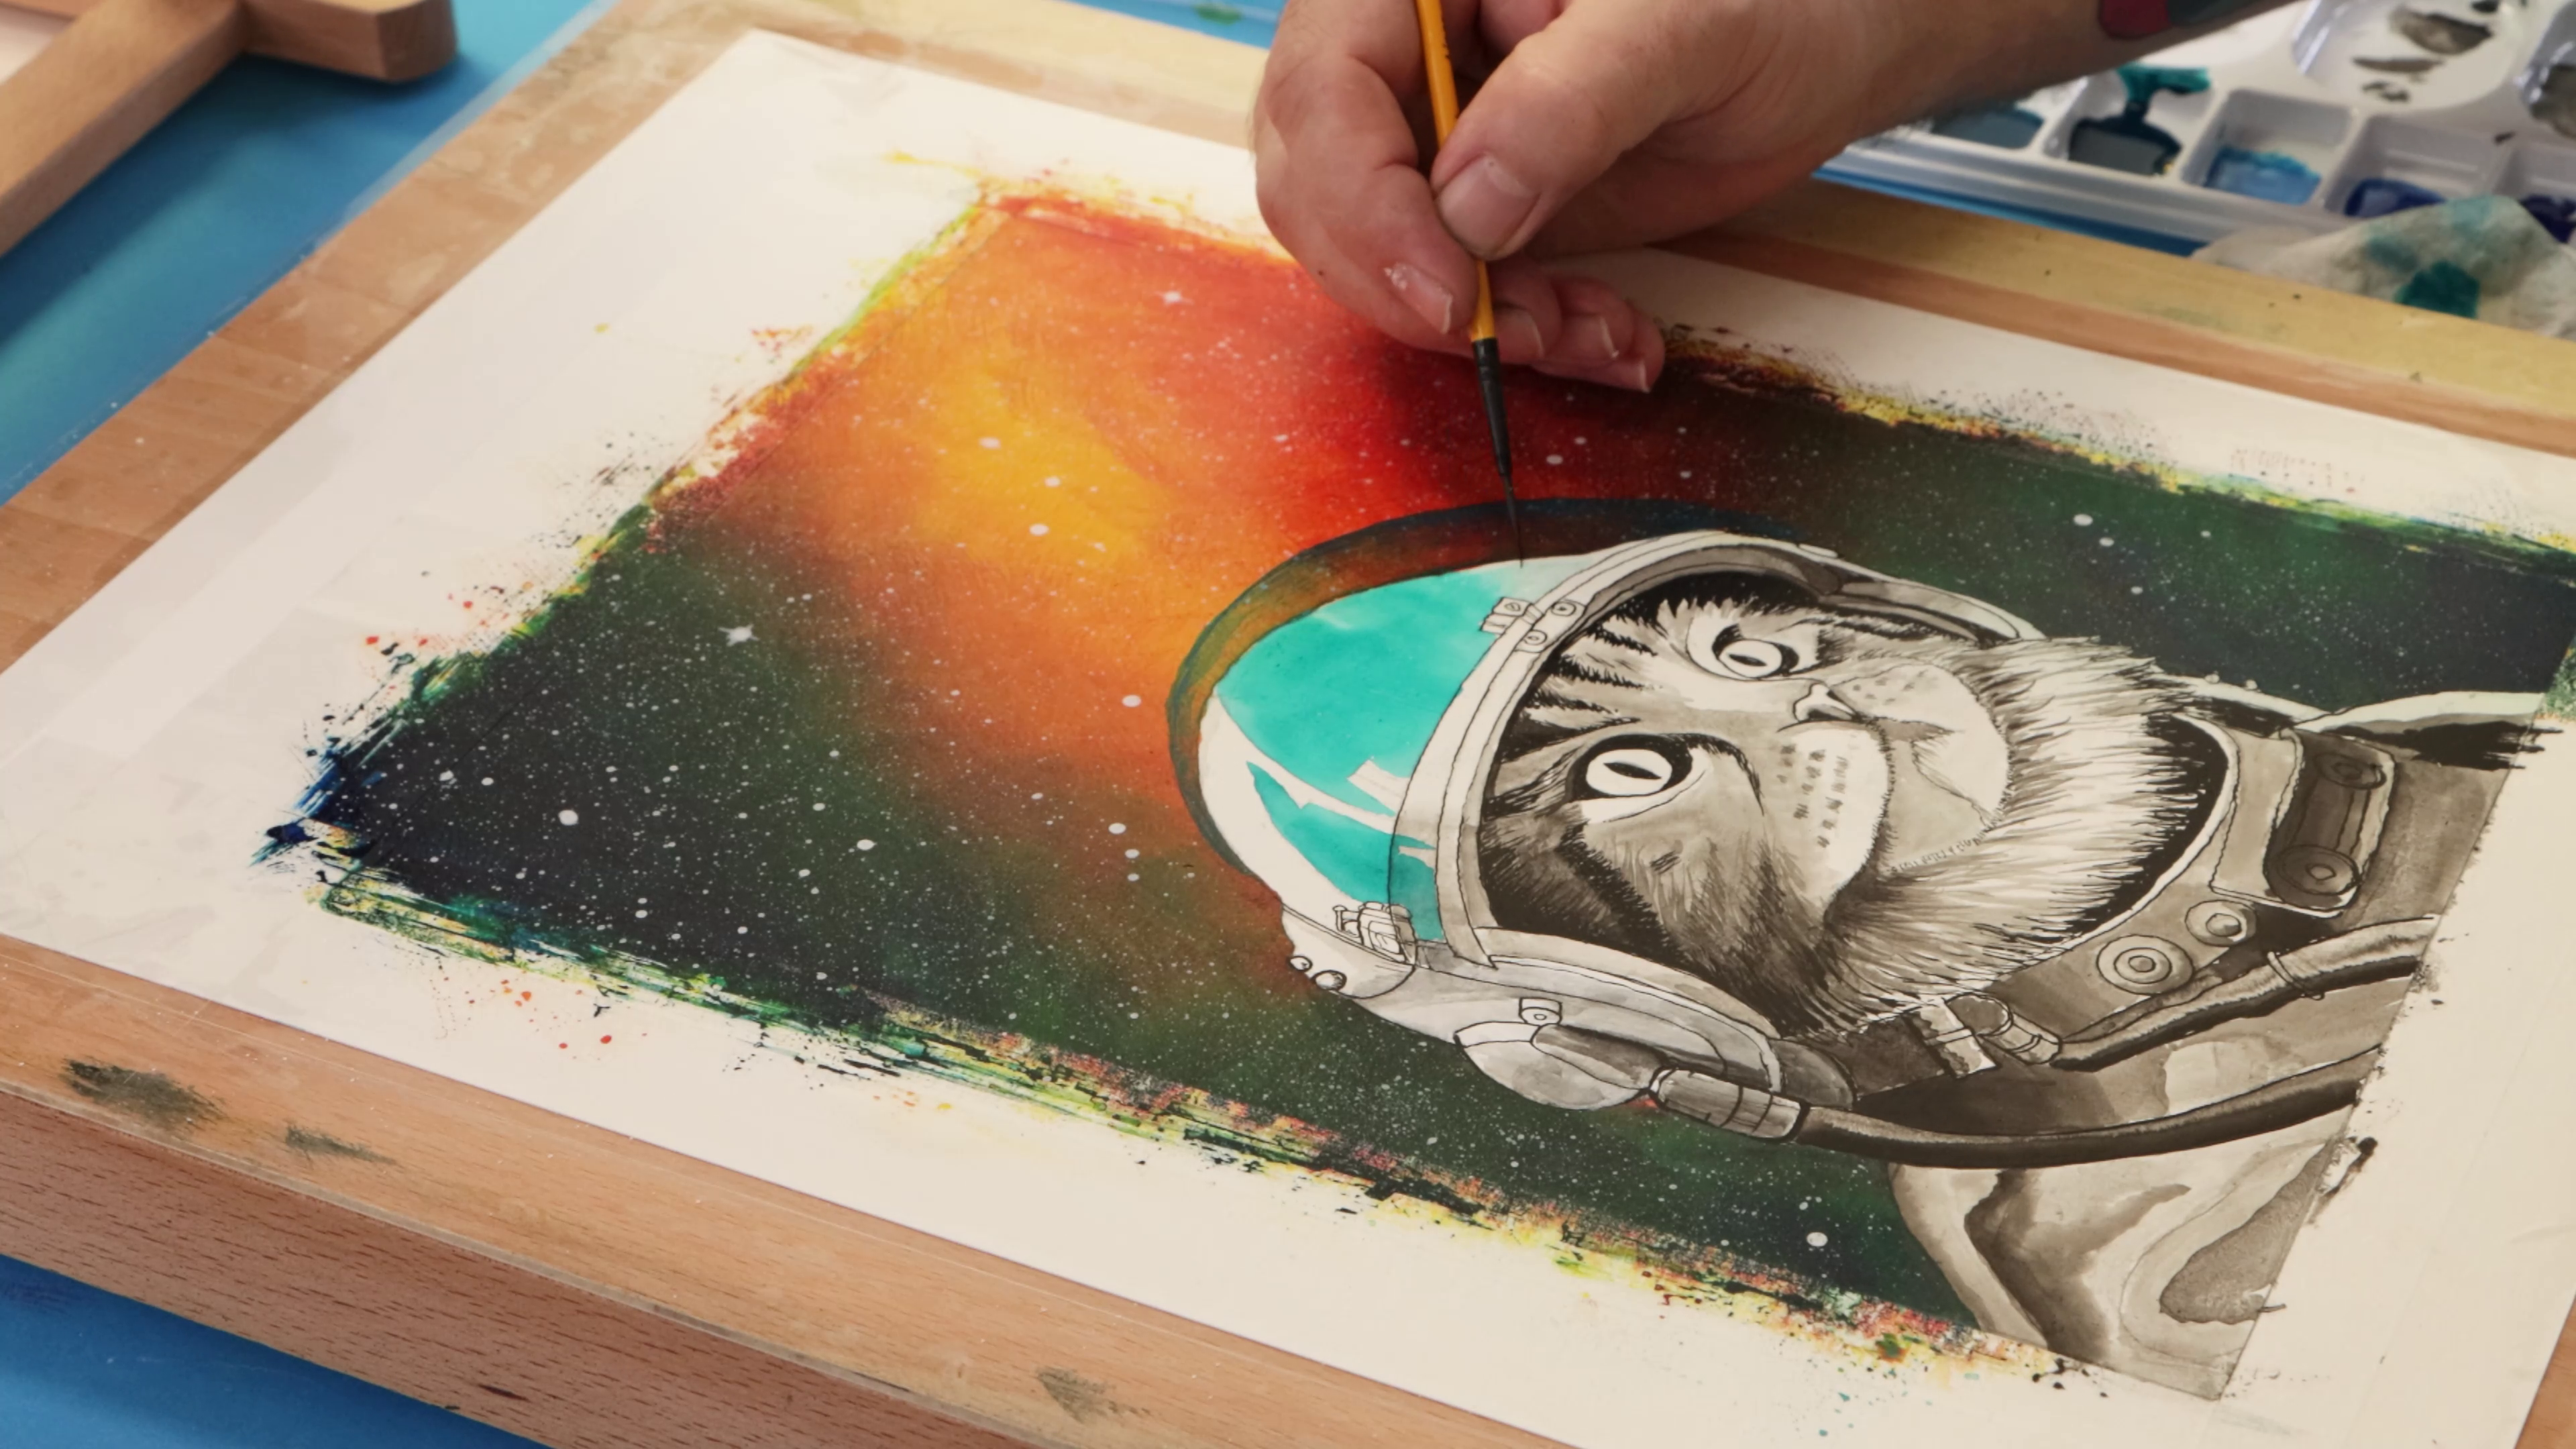
- Paint the helmet with Turquoise ink
- As you work, blend in water to subtly lighten the colour in certain areas for a translucent effect
- Make sure the background remains visible through the visor
Step 9: Space suit painting
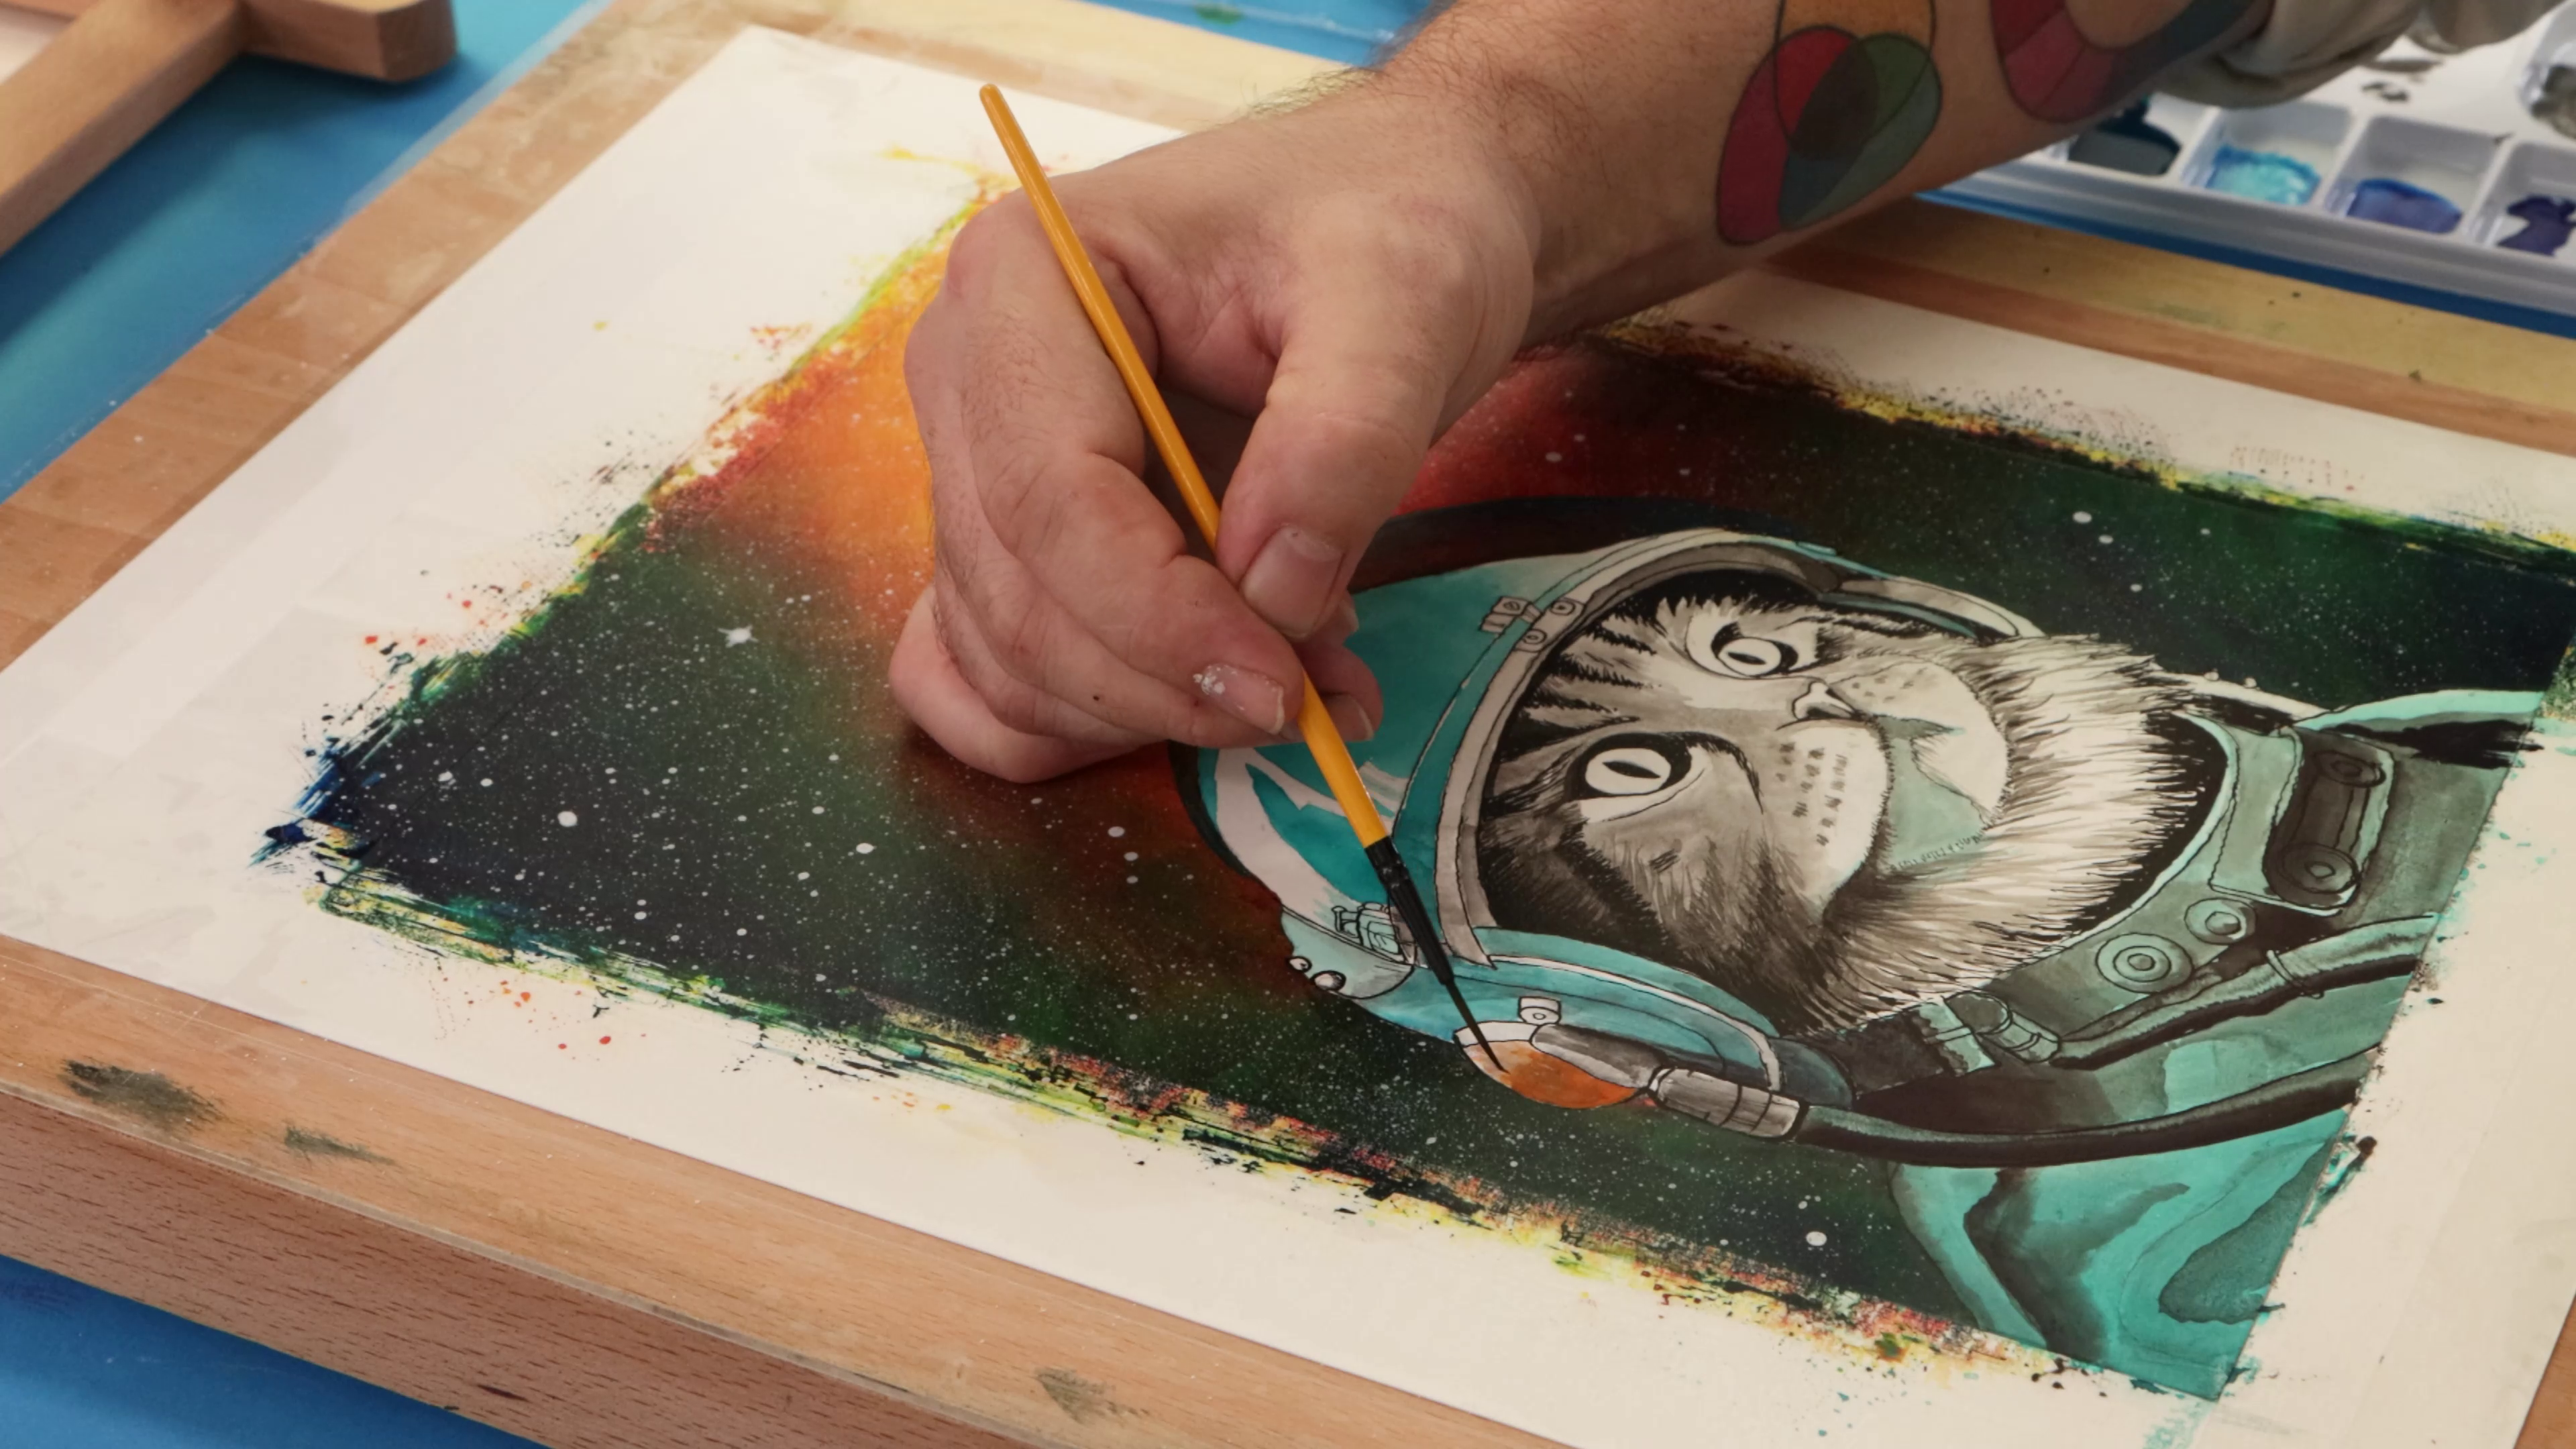
- Paint the space cat's suit in Turquoise
- Add details like the earphones in orange
- Mix Yellow Ochre with a touch of orange to paint the cat’s fur
Step 10: Finishing details
- Use a mix of orange and white to paint the cat’s nose
- For the eyes, use Bright Green and carefully paint the iris, leaving highlights for added realism
All done, so admire your handiwork and hang it on the wall! This art will bring a space-age quirky touch to any home.
- Mixed Media Pad Premium 300gsm A3
- Drawing Board Signature A3
- Acrylic Medium Matte Premium 250ml
- Acrylic Inks Premium 12pc: Cadmium Yellow, Orange, Scarlet, Violet, Phthalo Blue, Turquoise, Bright Green
- Masking Fluid Premium 120ml
- Brushes (Taklon Flat 50mm, Mop, Liner)
- Calligraphy Dip Pen Set Signature 10pc (003 nib)
- Graphite Pencil
- Tape
- Water
- Reference image of space cat
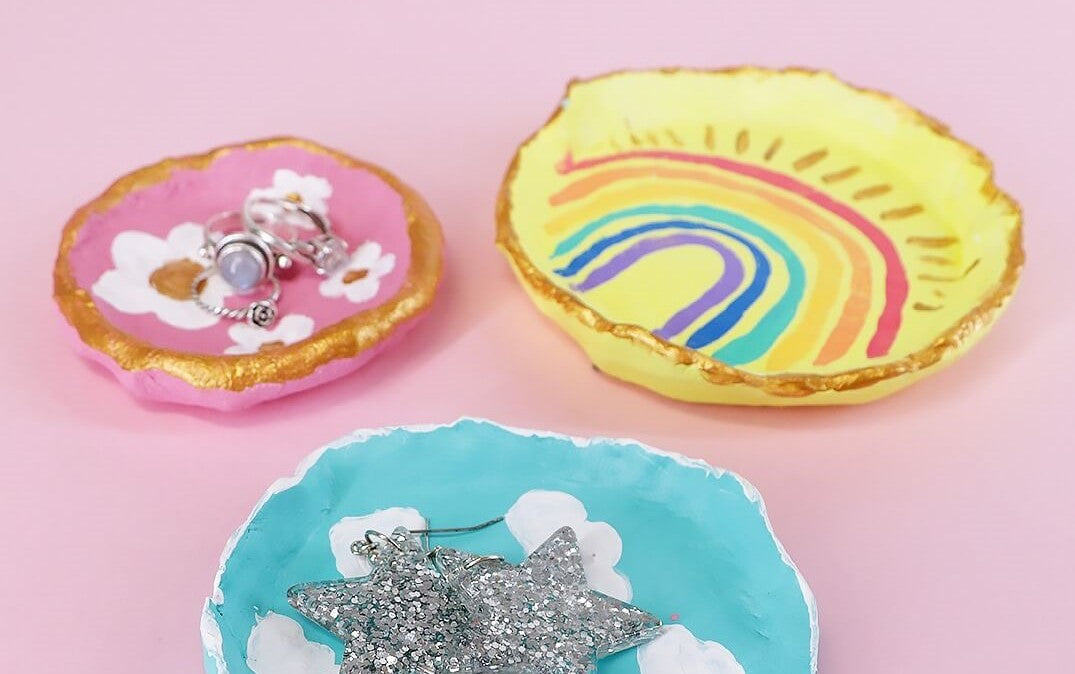
You may also like

Cactus ring holder DIY

Acrylic watermelon slice painting with Jacklyn Foster
Air dry clay trinket dish DIY


