Create a one point perspective drawing with graphic fineliners
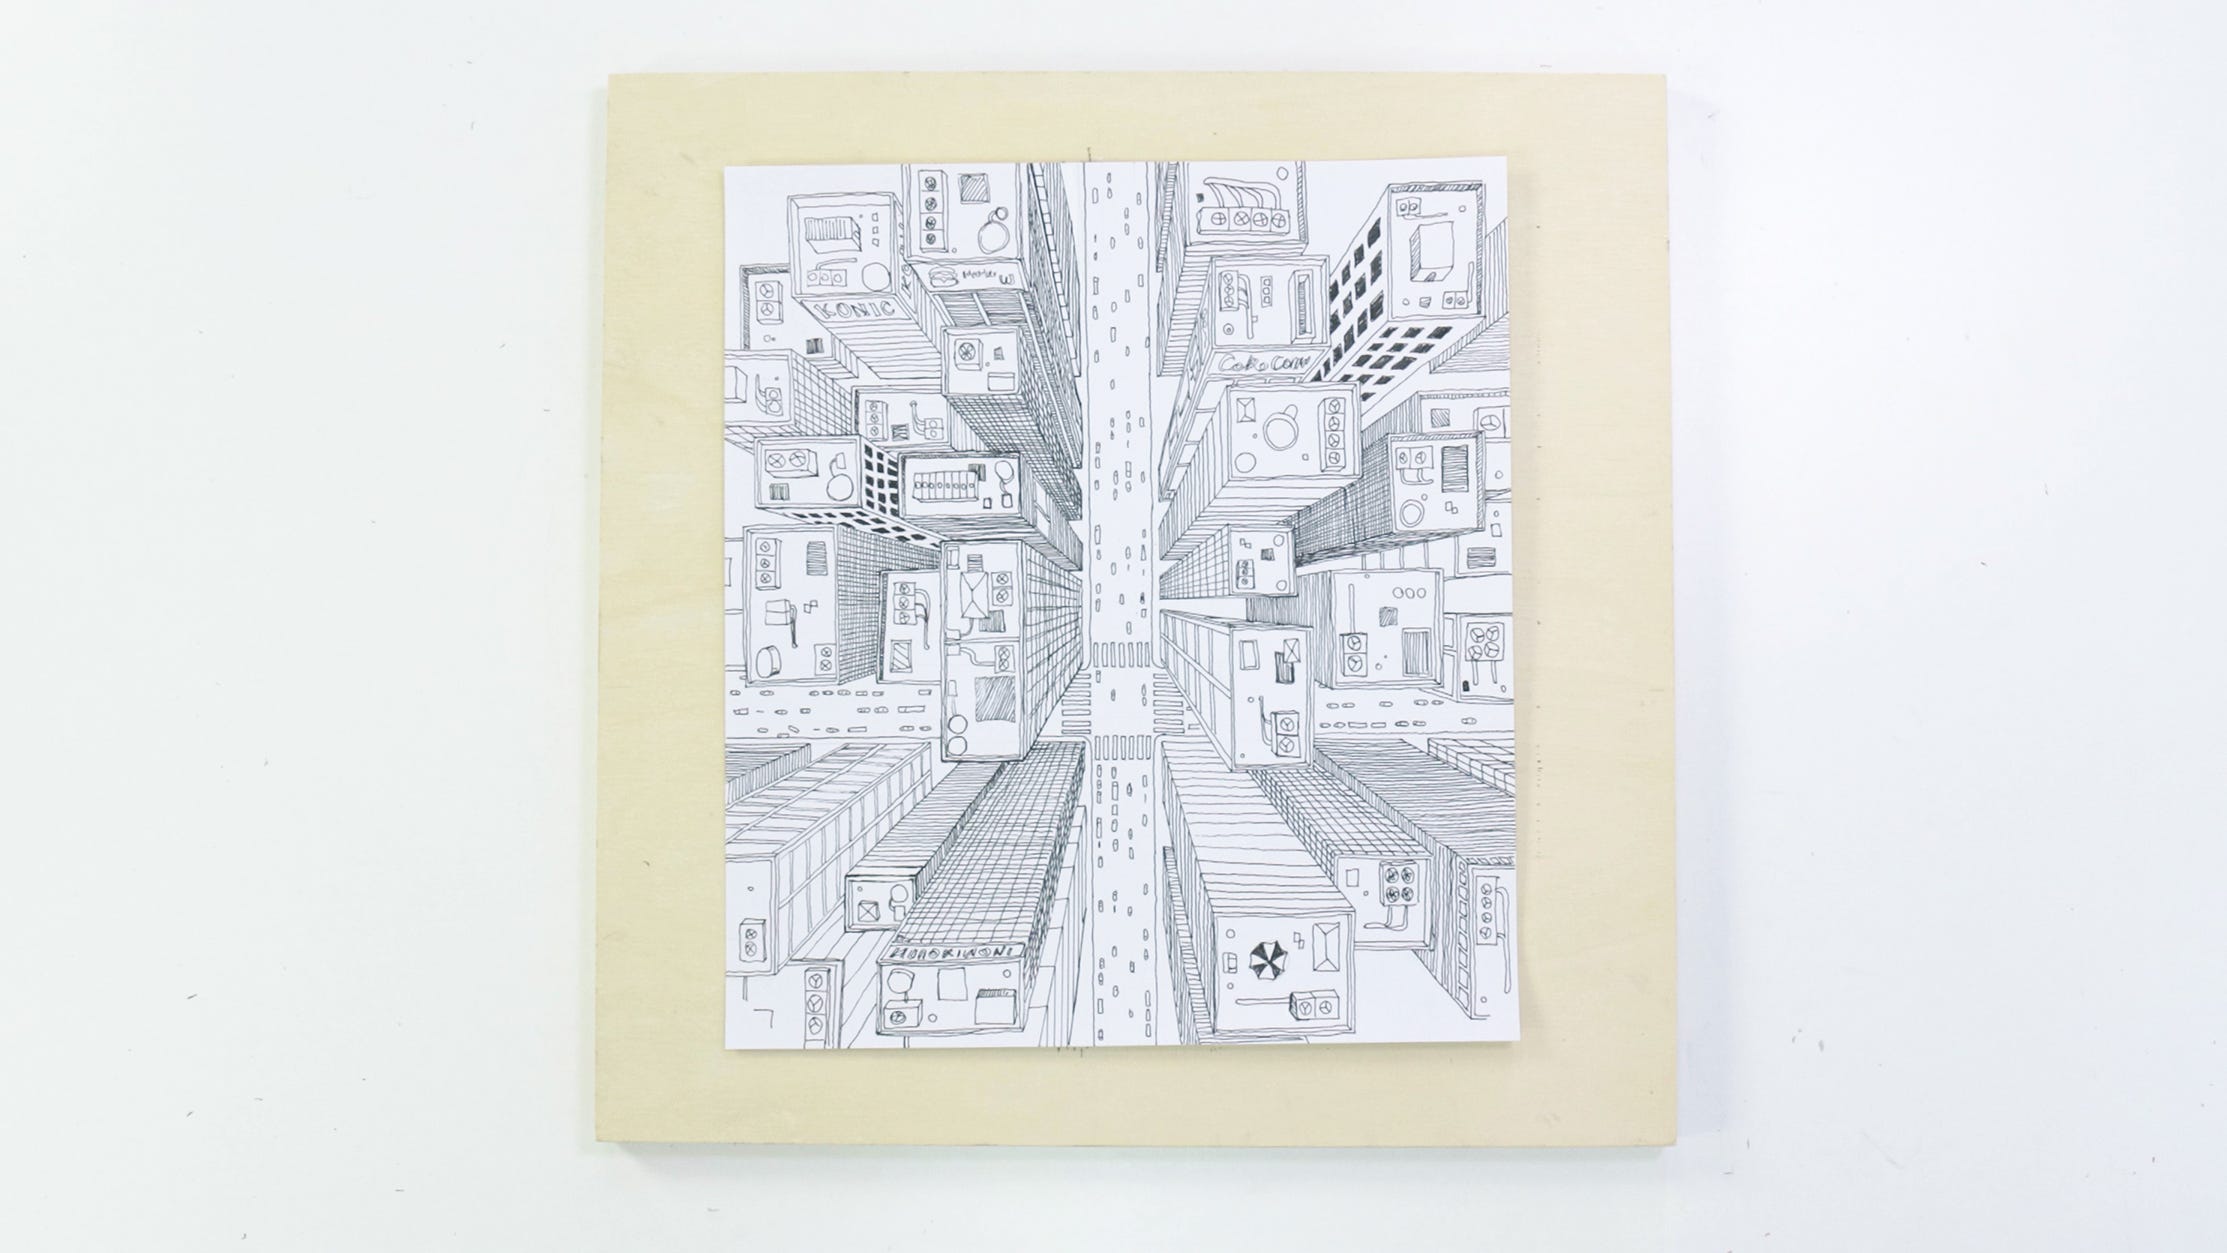
The sky's the limit for this week's One Point Perspective project. Follow along to learn how to create a cityscape using a pencil, Fineliner, tac and string to help you draw from a bird's eye view.
You will need
MSB0054 MM Sketch Pad 150gsm 25 sheet A3
MMPM0025 MM Graphic Fineliners Set 7pc
From your studio
MBST4040 MM Painting Board 40.6x40.6cm or a board to draw on
2H pencil
A ruler
A pin
Thread
Tape
1. Creating the intersection
Secure the paper to the board with small pieces of tape in each corner. Using a ruler, create a diagonal line from corner to corner to find the central point. Mark the point then place the ruler on the sheet and rule a light line either side. Rule out two more lines horizontally to create an intersection.
To fix the thread to the board, we will use the pin. Connect the thread to the pin by creating a loop in the end, placing the pin through it and pressing it into the centre point of the page. If you struggle to see the thread, you can darken it with a marker.
2. Drawing the buildings
Use the 0.3 pen to start adding the buildings. The top of the buildings will be square to the viewer as the vanishing point is in the middle of the page. The easiest way to create a building is to draw in the top of the building then place the thread on a corner and draw the line in to the edge of the road. Don’t go over the line we put in for the edge of the road.
Add air conditioning units, cooling, electrical generators, chiller plants, water pumps and other elements to the top of the high rises. All high rises are built differently so add a different effect to each one. For one, draw intersecting lines over it and the one next to it, add horizontal lines. On another building, draw squares over it to suggest large windows.
In some cases it’s a good idea to first draw in the top of the building with pencil to see if you’re happy with the positioning before you commit to adding the pen line.
You also have to give some thought to where the buildings lie in relation to one another. Don’t draw the buildings directly next to each other as there is always space between them. Buildings are also all different heights so where the top of the building is positioned will have a bearing on this.
It’s best to start in the middle and work your way out. Obviously, you will see the effect of the perspective is more severe and flatter the further away from the vanishing point the building is.
3. Final details
Once buildings on either side of the roads are in, remove the pin and rule in some guidelines for the sidewalks and the zebra crossings and draw them in. Cars can be suggested with little oval shapes drawn onto the road.
Material List
- Sketch Pad Signature 150gsm 25 Sheet A3 297 x 420mm (11.7 x 15.5in)
- Graphic Fineliners Set Premium 7pc


