Are you looking for a tool that’s great for illustrating, calligraphy, journalling, mixed media, and loads more art projects? Mont Marte Real Brush Pens have flexible brush tips with smooth flowing ink so you can create stacks of different line weights, styles, and techniques. Read on to discover some of the best ways to use them for your next project!
1. Brush pen shading
Brush pens are great for illustrating, portraiture, lettering and more, with diverse line weights and styles. No matter how lightly you press, the ink remains the same colour and opacity, so shading is not as straightforward as with graphite and charcoal.
One way to shade with brush pens is to have a broad colour range, and switch between hues for light, mid, and dark tones. This can create a smooth transition while shading from light to dark, shifting along the colour gradient to match the tones in your reference. You may even layer and overlap your hues to blend them for smoother transitions.
You can also try using classic shading techniques such as hatching and crosshatching to create depth and blend your colours. Just cross lines over closely and tightly for darker tones, and space your linework out for lighter areas.
Lastly, explore using water to blend and soften your ink shading. Lay down colour with your pen and then use a wet brush to dilute the ink with water and spread it out for shading. This is great for creating watercolour and glazing effects, for softer colouring.
2. Calligraphy
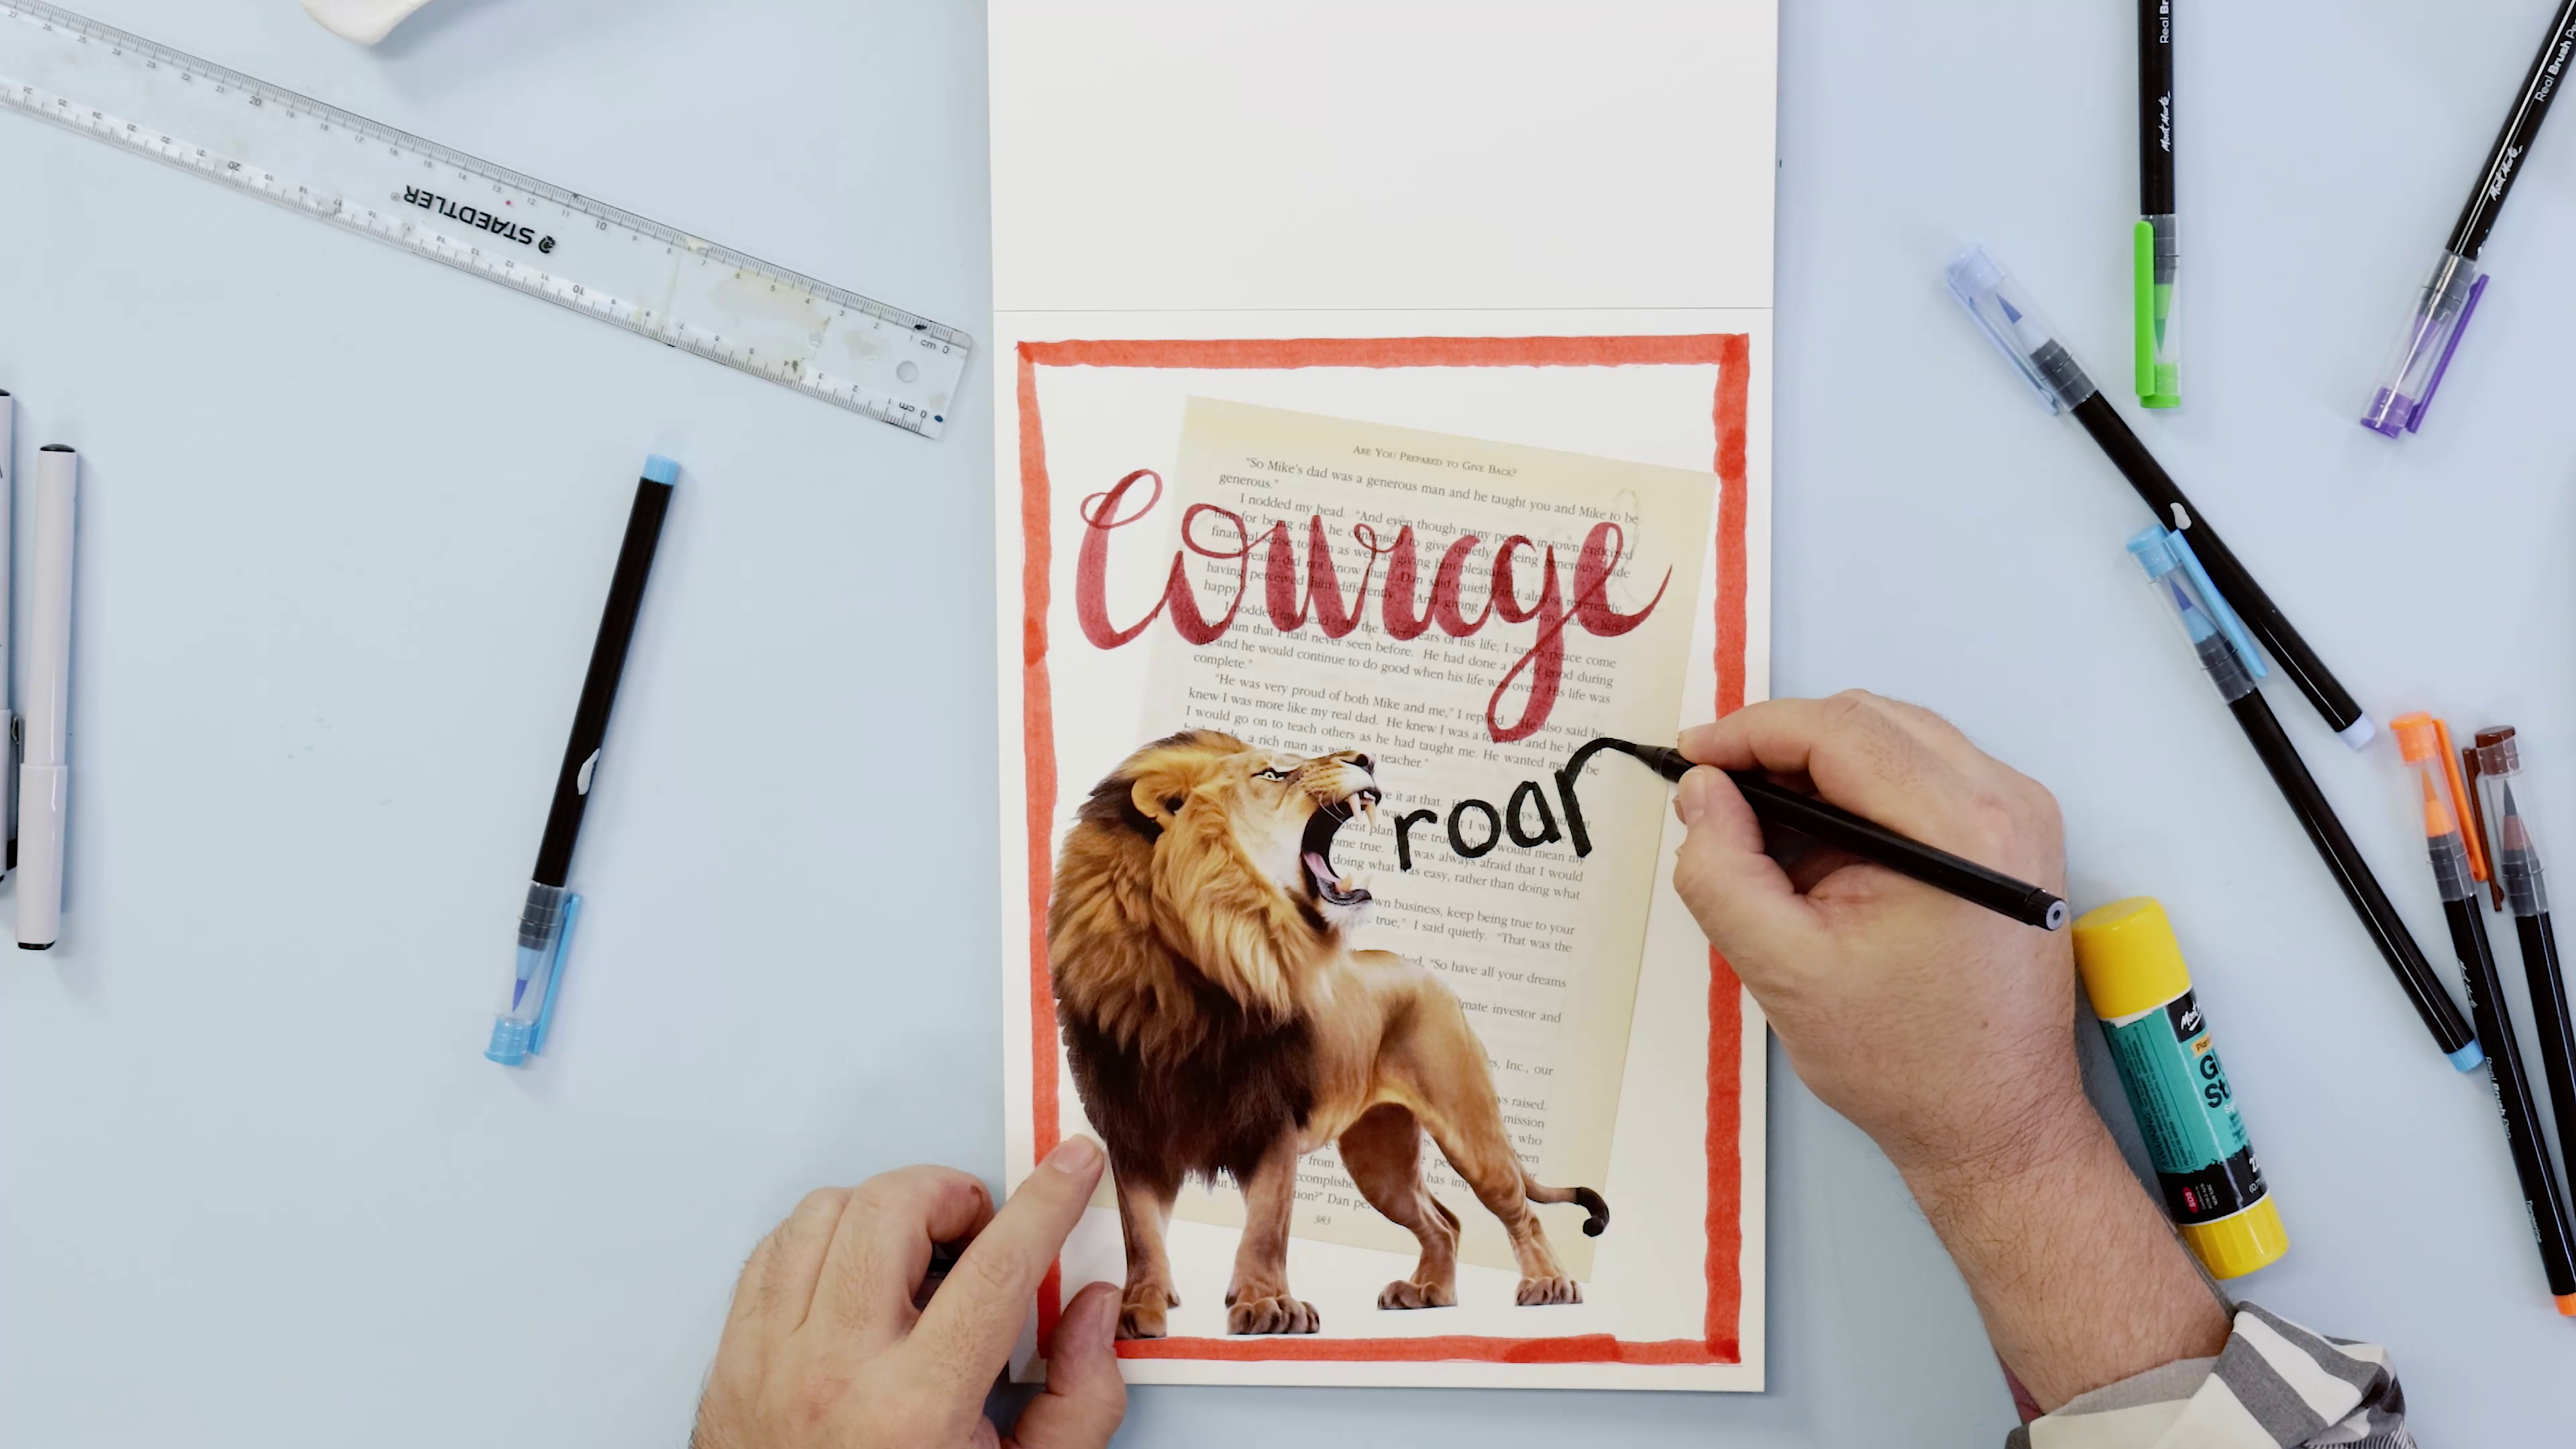
Explore decorative writing and lettering using our Real Brush Pens. There are traditional rules, instructions, and techniques you can try out, or you can make your own lettering style!
The key to most calligraphy scripts is to apply pressure on downward strokes and reduce pressure on upward strokes. This creates a thicker weight for lines travelling down and thinner for lines travelling up.
Add flourishes to the first letter of your script and the last, creating designs that frame your words! Brush pen tips are flexible and move fluidly with your lettering strokes, with smooth ink flow for loads of different styles.
3. Brush pen blending
Grab a set of Dual Tip Colourless Blenders to help blend colours seamlessly. Colour and overlap your hues before using a colourless blender to smooth the transition between shades and create a gradient. Our blenders can be a great tool to bridge colour gaps and add another dimension to your blending.
You can also blend colours by overlapping them and gradually changing hues for smooth gradients. Starting with your lightest colour, work through the hues, layering colours over one another as you introduce each new tone. Whether you’re colouring with the side of the brush or hatching, you can create blends between colours using this technique!
4. Watercolour and pen
Use your pens alongside watercolours to add in fine lines and details without losing soft colouring and style. If you don’t want to break out your watercolour detail brushes, grab your brush pens to add outlines, deepen your shadows, and create intricate patterns on your designs. The flexible tip is great for varying line weights so you can control your colours with ease.
Our Real Brush Pens also use water-based ink so you can manipulate the colours with water. Your main lines will stay visible, but you can soften the edges and blend them into the surrounding watercolours if you like! This helps create dimensional artwork with layered effects and bold details.
5. Pen glazing
If you’re looking to try a glaze or watercolour effect with your brush pens so you can see through the ink to colours below, try dipping it into water! This will dilute the ink in the brush, mixing it with water to create a transparent, glaze effect.
You can do this to portray a see-through reference, like tinted glass or clear water. Or else use the diluted colours as mid or light tones. Just be aware, you may need to swipe your brush pen on dry paper a few times to get your ink concentrated again.
6. Bloom technique
Start by creating a wet wash on your paper by brushing the page with water. Dot your brush pen tip onto the wet surface and watch as the ink blooms from the point of contact. Try dragging your pen lightly over the surface to create wispy lines with ink bleeding outwards from the centre. This technique is great for drawing lines that are softer and less sharp, with a unique, swirly ink effect.
As more water soaks into the pen brush tip, the colour will dilute, so keep some dry paper on hand to scribble on when you need to bring more ink to the brush. Drawing on a dry surface will remove some of the water, so your ink becomes more concentrated again.
7. Mixed media
Have a go using brush pens with all kinds of art mediums! Combine with watercolours, fluid inks, drawing pens, markers, dip pens, masking fluid, and more to create stacks of different artwork. We talk about some great Mixed Media techniques in this handy blog, but you can experiment at home to discover which combinations suit you best!
Journaling is a great space to have a go with different mediums, try lettering styles, and explore creating. Brush pens go hand in hand with journaling as they're so handy for illustrating and lettering, which are core journal practices. Cut and paste clippings from magazines and newspapers, doodling over the top and inscribing your thoughts about them with fun script designs. The possibilities are endless!
Grab some Real Brush Pens and try out these brush marker techniques at home. Using a brush pen is a satisfying experience, as you watch and feel how to line weight changes depending on the pressure and angle of your application.
If you feel inspired to make something, #montmarteart or tag us @montmarteart on Instagram or Facebook. We’d love to see what you come up with!
Check out our tips and techniques page for loads more ideas and inspo. To stay up to date with our latest products, art lessons, how-tos, hacks, and more, subscribe to Creative Connection by entering your email down below.


