


DIY project: palette clock
Step 1: Clock assembly
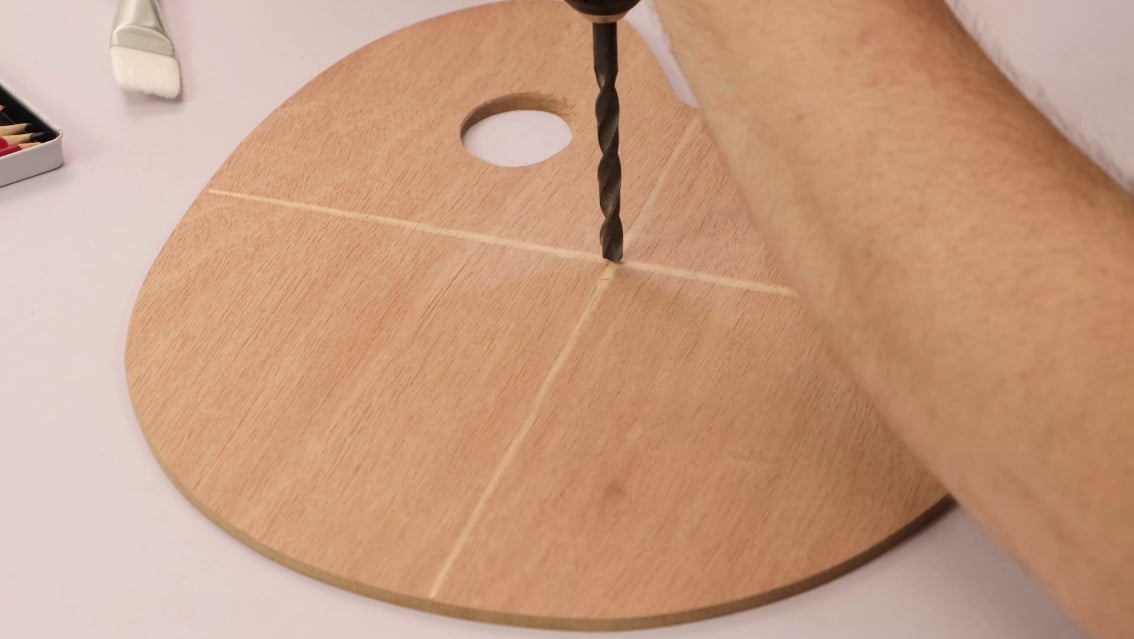
- Use a ruler to draw a cross on the palette
- Mark the centre point where the lines intersect
- Using a 5mm drill bit, drill a hole at the centre mark
- Insert the clock mechanism through the hole and secure it with the fasteners
Step 3: Drawing a clock face
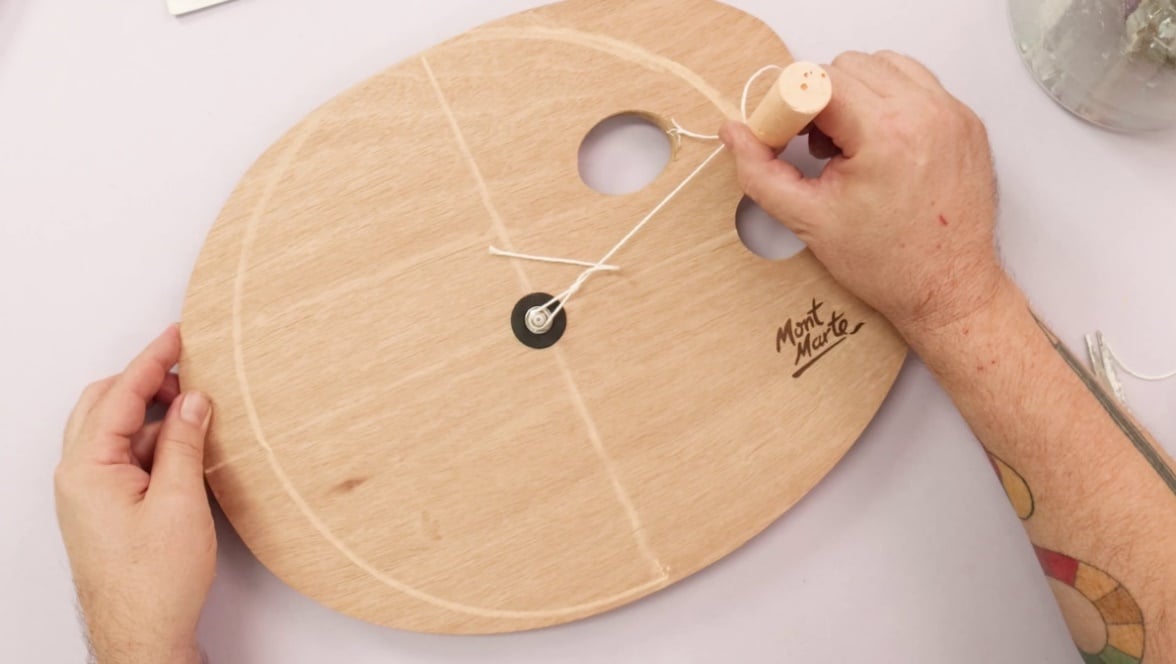
- Tie a loop of a string around the centre clock fastener
- Wrap the other end of the string around a piece of chalk
- Use this DIY string compass to draw a circle onto the palette
- Sketch circles at each hour of your clock
Step 4: Painted clock face
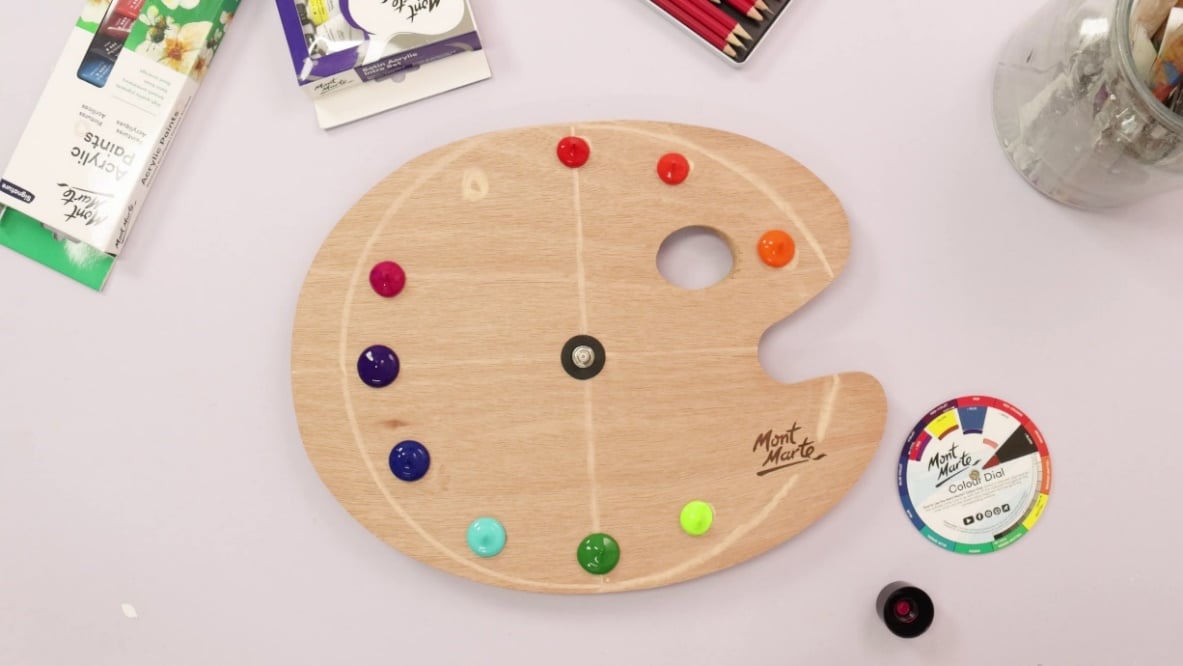
- The idea for this clock is to follow a colour wheel’s order of primary and secondary colours
- Put a dollop of each colour at the following positions:
- 12:00 – Brilliant Red
- 1:00 – Vermilion
- 2:00 – Orange
- 3:00 – Leave blank (the thumb groove is here!)
- 4:00 – Mont Marte logo placement (if using our wood palette)
- 5:00 – Light Green
- 6:00 – Sap Green
- 7:00 – Turquoise
- 8:00 – Phthalo Blue
- 9:00 – Violet
- 10:00 – Phthalo Blue + Crimson mix
- 11:00 – Crimson
Step 5: Make your own clock hands
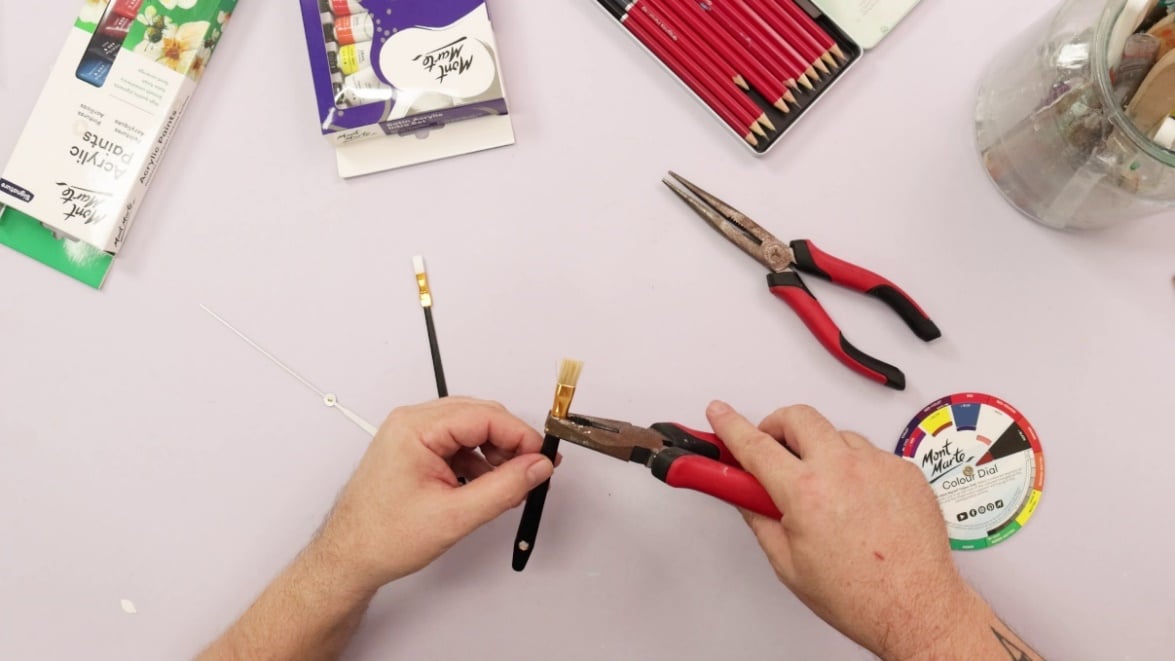
- To give the clock hands an artistic touch, attach ferrules and brush tips
- Remove a ferrule from an old paintbrush and slide it over the hour clock hand
- Use flat nose pliers to press it flat and secure it in place
- Repeat the process for both the minute hand
- Attach the clock hands onto the mechanism
- Clean off any remaining chalk lines with a wet brush
- Hang your newly created palette clock on the wall
Now you’ll never lose track of time in your creative space!
- Wood Palette Signature
- Acrylic Paints (Crimson, Brilliant Red, Vermilion, Orange, Light Green, Sap Green, Turquoise, Phthalo Blue, Violet)
- Ferrules/brush tips (optional, for decorating clock hands)
- Chalk
- Clock mechanism & hands (available at most craft stores)
- Drill & 5mm drill bit
- Ruler
- String (for a string compass)
- Flat nose pliers
You may also like
How to draw an orchid with coloured pencils
Turtle pinch pot with air dry clay
How to paint acrylic flowers for beginners


